
UNLE⛧SH THE BEAST ト何ゼ
| [MENU] | |||||||||
| [THOUGHTS] | [TECH RESOURCES] | [TRASH TALK] | |||||||
| [DANK MEMES] | [FEATURED ARTISTS] | [W] | |||||||
DevSecOps Series II - Simple Pipeline
Feb. 5, 2025 // echel0n
Hello guys! As I promised before, this is the second blog of DevSecOps Series! I hope your 2025 is going well already. In this blog, I will provide an example of a local lab environment for DevOps (for now, it’s a simple DevOps setup), which relies on GitLab, Jenkins, and Nexus. You can find k8s yaml files that are used in this blog in this repository. We will set up CI/CD for the Damn Vulnerable Java Application. I also walk you through the installation of the tools too!
Table of Contents
- Used Tools, Tested Hardware/Software and Warnings
- Installation - Docker & Kubernetes and Tool-Chain
- GitLab Setup
- Jenkins Setup
- Jira Setup
- Nexus Setup & DVJA Repository
- Creating a Pipeline
- Deployment
- Conclusion
-1 Glossary (Optional)
- SCM: Source Code Management
- CI/CD: Continuous Integration / Continuous Deployment
- Docker: A platform designed to help developers build, share, and run containerized applications (Originally depends on LXC and AuFS). Docker on Linux has no virtualization.
- Image Repository: A storage system that houses container images, serving as a central location for storing and managing images used in containerization technologies.
- Kubernetes: Kubernetes is a portable, extensible, open source platform for managing containerized workloads and services.
- k3s: k3s is a certified Kubernetes distribution designed for production workloads in unattended, resource-constrained environments.
- Pipeline: A series of steps that must be performed in order to deliver a new version of software.
- DevOps: The combination of cultural philosophies, practices, and tools that increases an organization's ability to deliver applications and services.
0 Used Tools, Tested Hardware/Software and Warnings
Some configurations here and in the repository I referenced may be insecure, and it is recommended that you act with awareness. Since this is a lab environment, we will not be making many security configurations of the tools.
These are the tools we will be setting up.
- SCM: GitLab
- CI/CD: Jenkins
- Image Repository: Nexus
- Ticketing: Jira Free Version (no ref in this blog but in further blogs we will be using Jira)
- Kubernetes distribution: k3s
- Target Application: DVJA - Damn Vulnerable Java Application
Provided configurations are tested in this hardware and software;
- CPU: AMD Ryzen 9 5900X (24) @ 5.619GHz
- Memory: 23909MiB
- Swap: 4GB
- OS: ArchLinux 6.12.4-zen1-1-zen
- Terminal: 5.2.37
- Docker version 27.3.1, build ce1223035a
- k3s version v1.31.3+k3s1 (6e6af988)
- go version go1.22.8
This setup is using a lot of resources. Be careful after deploying the tools, as they can quickly exhaust your resources. Do not forget to save your critical data while the instances are running. I am pretty new to Kubernetes so I am open to fine-tuning suggestions, please feel free to get in touch, it would be great to learn more.
I also am aware that GitLab has a native CI/CD, however I wanted to seperate the CI/CD part from a SCM.
1 Installation - Docker & Kubernetes and Tool-Chain
Since we will deploy all the required tools into k8s, we first need to install Docker. I would not know which Linux distro you're using so please install docker independently. Then, enable and start the docker service. If you do not want to deal with adding users to the Docker group or managing permissions, just run the following command:
- sudo chmod 777 /var/run/docker.sock
- # This is a dangerous operation, you will expose docker APIs to everyone.
Once you have ensured that the Docker daemon is running, the next step is installing k3s on your machine. K3s is a lightweight kubernetes without compromising any functionalities and k8s capabilities has. I benchmarked bunch of kubernetes alternatives for my local computer and decided to go with this version. As the development team suggests; the memory footprint and the binary itself much smaller than k8s. If you are running a computer with more rich resources, you can stick with the k8s original distribution. The installation is up to you either use this suggested one liner or get the binary and run without installating globally;
- curl -sfL https://get.k3s.io | sh -
Check if k3s is running flawlessly with;
- sudo k3s kubectl get nodes

If your output also looks like this screenshot above, your node is running and it is ready to deploy stuff. I can assist you if something breaks while using Arch Linux; otherwise, my support might be limited. Deploy the yaml files that I provided here with this command;
- # run ./scripts/create_directories.sh before this command
- sudo k3s kubectl apply -f ./yamls/basic/
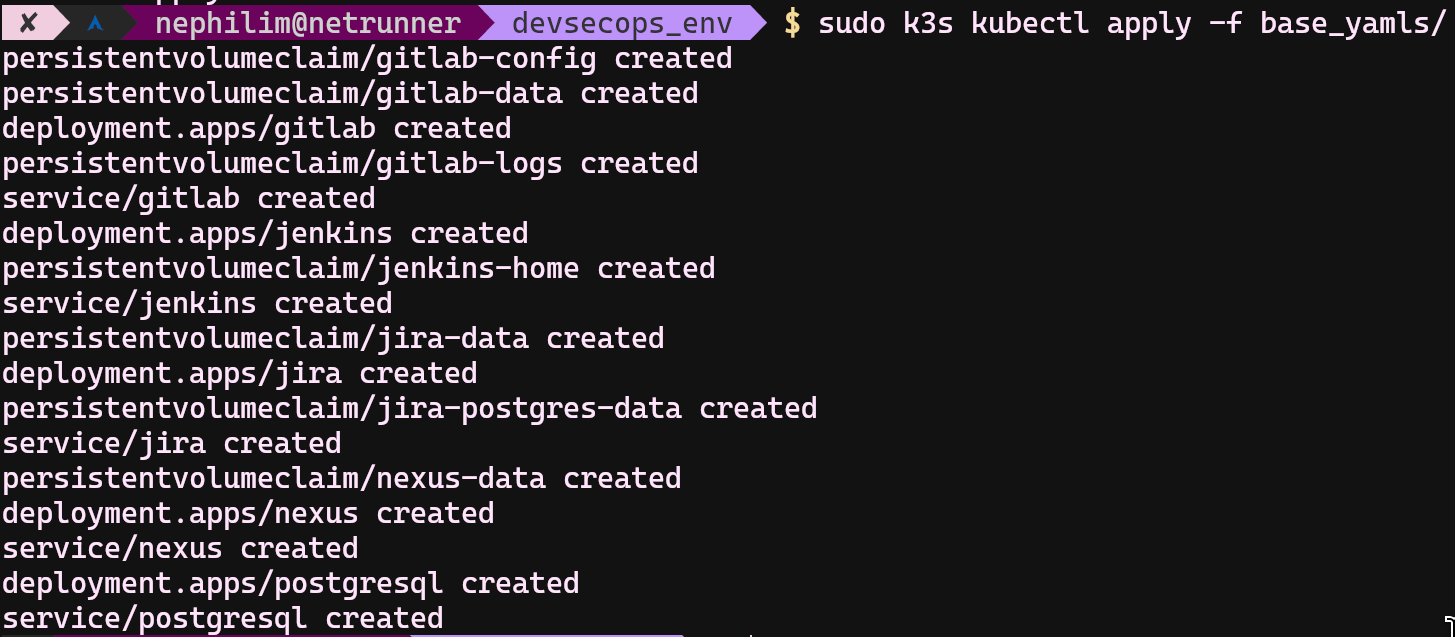
Run sudo k3s kubectl get pods and wait until see all STATUS columns are set to Running

If all pods are running also check;
- sudo k3s kubectl get services
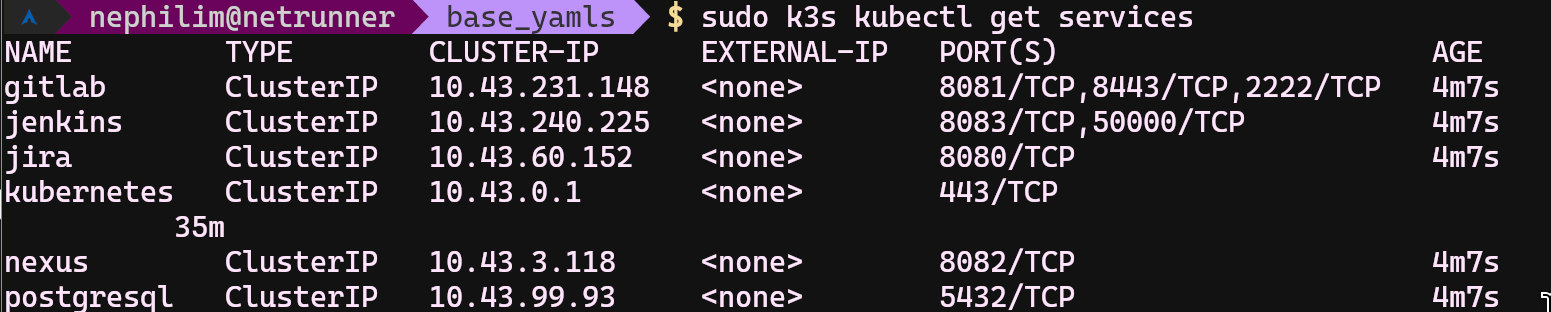
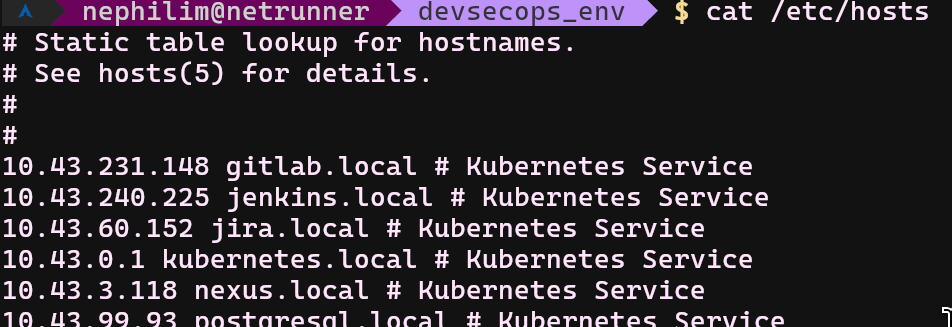
If you are okay with accessing applications via IPs, you can use IPs those are in this command output. Otherwise, you can copy&paste easily with this script into your /etc/hosts file, and access to applications with; gitlab.local, nexus.local,jenkins.local etc.
The list of deployed services and their ports are;
- gitlab.local:8081
- jenkins.local:8083
- jira.local:8080
- http://nexus.local:8082/nexus/
- postgresql.local:5432
Check if all services are up and ready for setup.
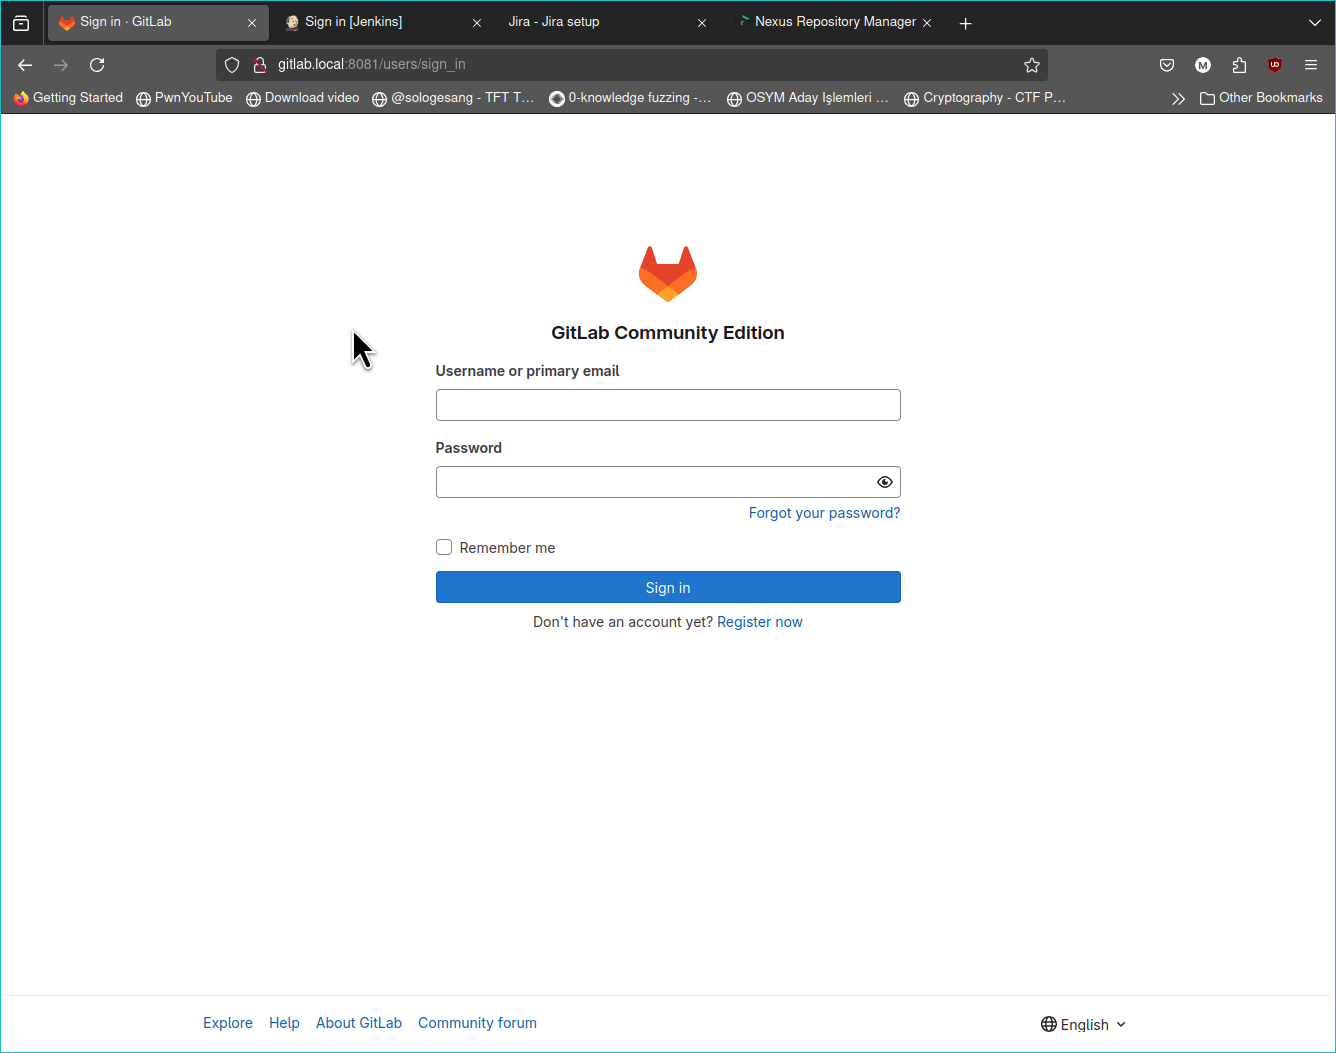


2 - GitLab Setup
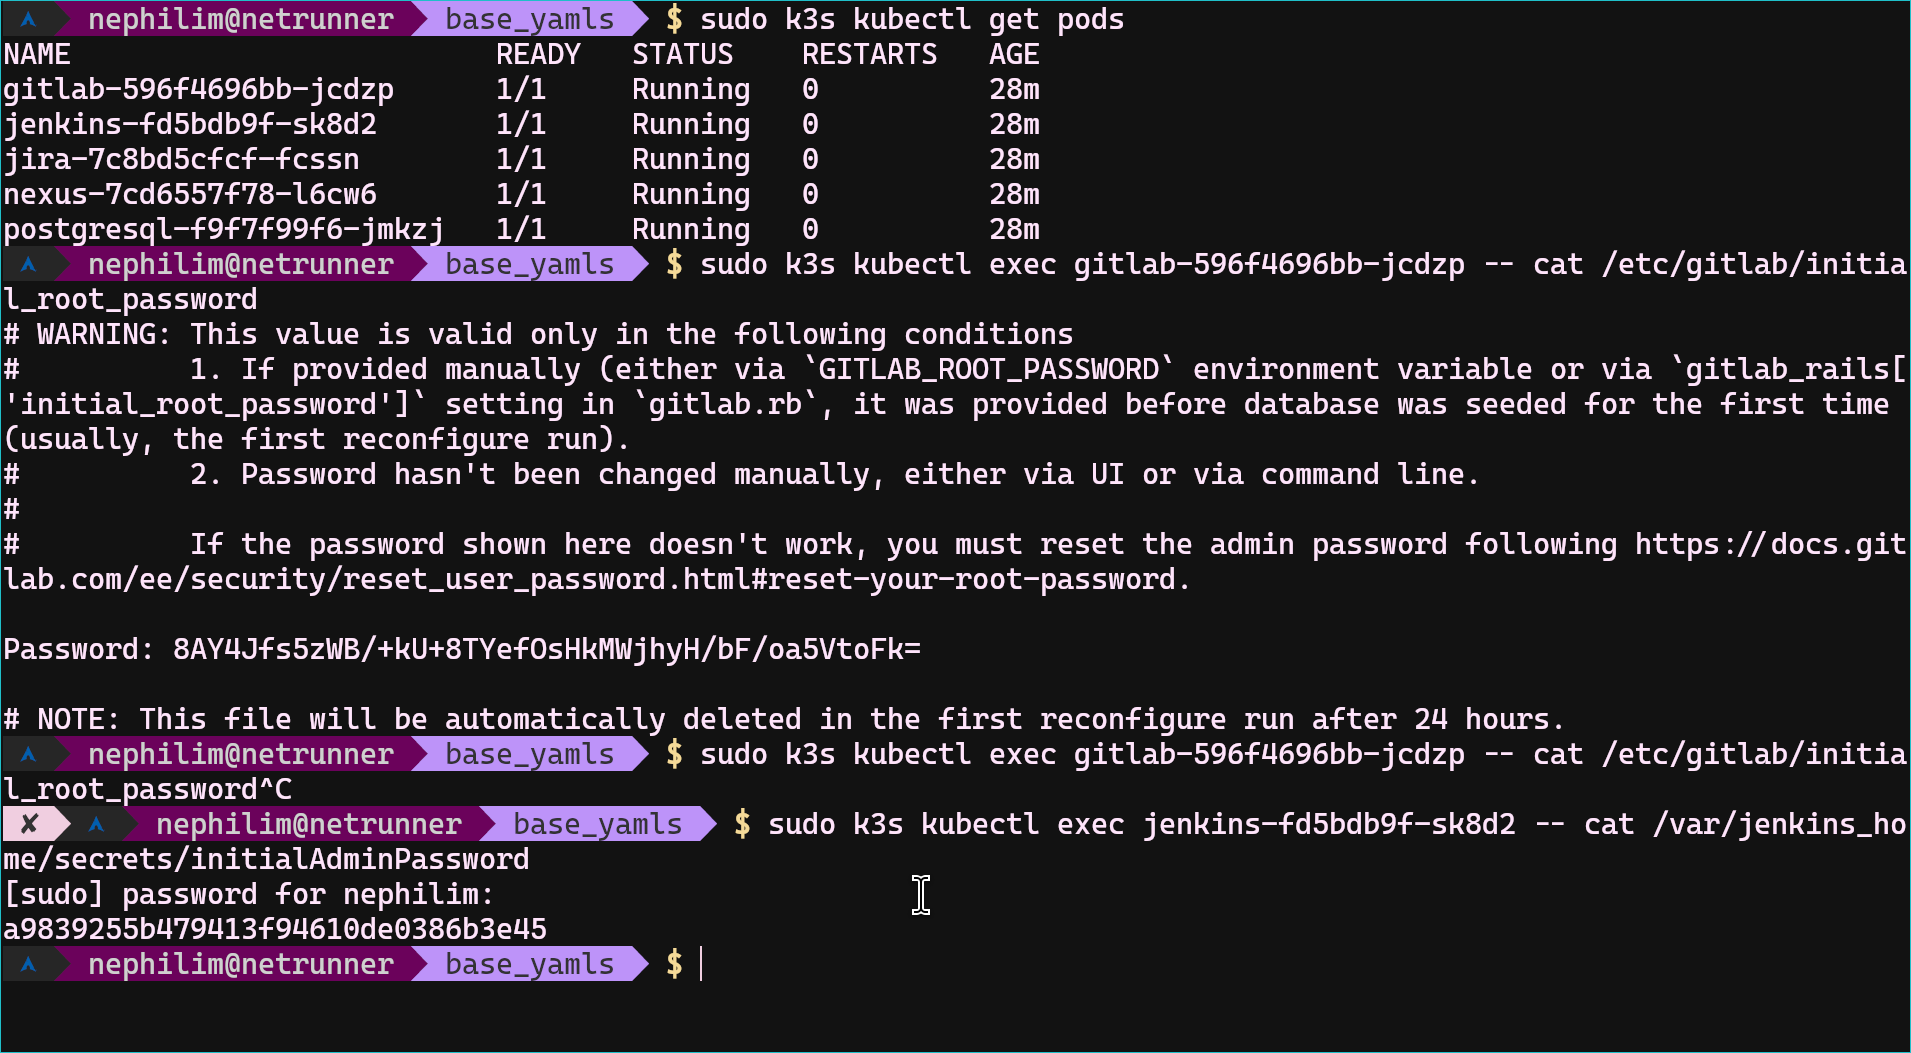
Before going further you should get the initial root password from the GitLab's container.
- sudo k3s kubectl exec gitlab-596f4696bb-jcdzp -- cat /etc/gitlab/initial_root_password
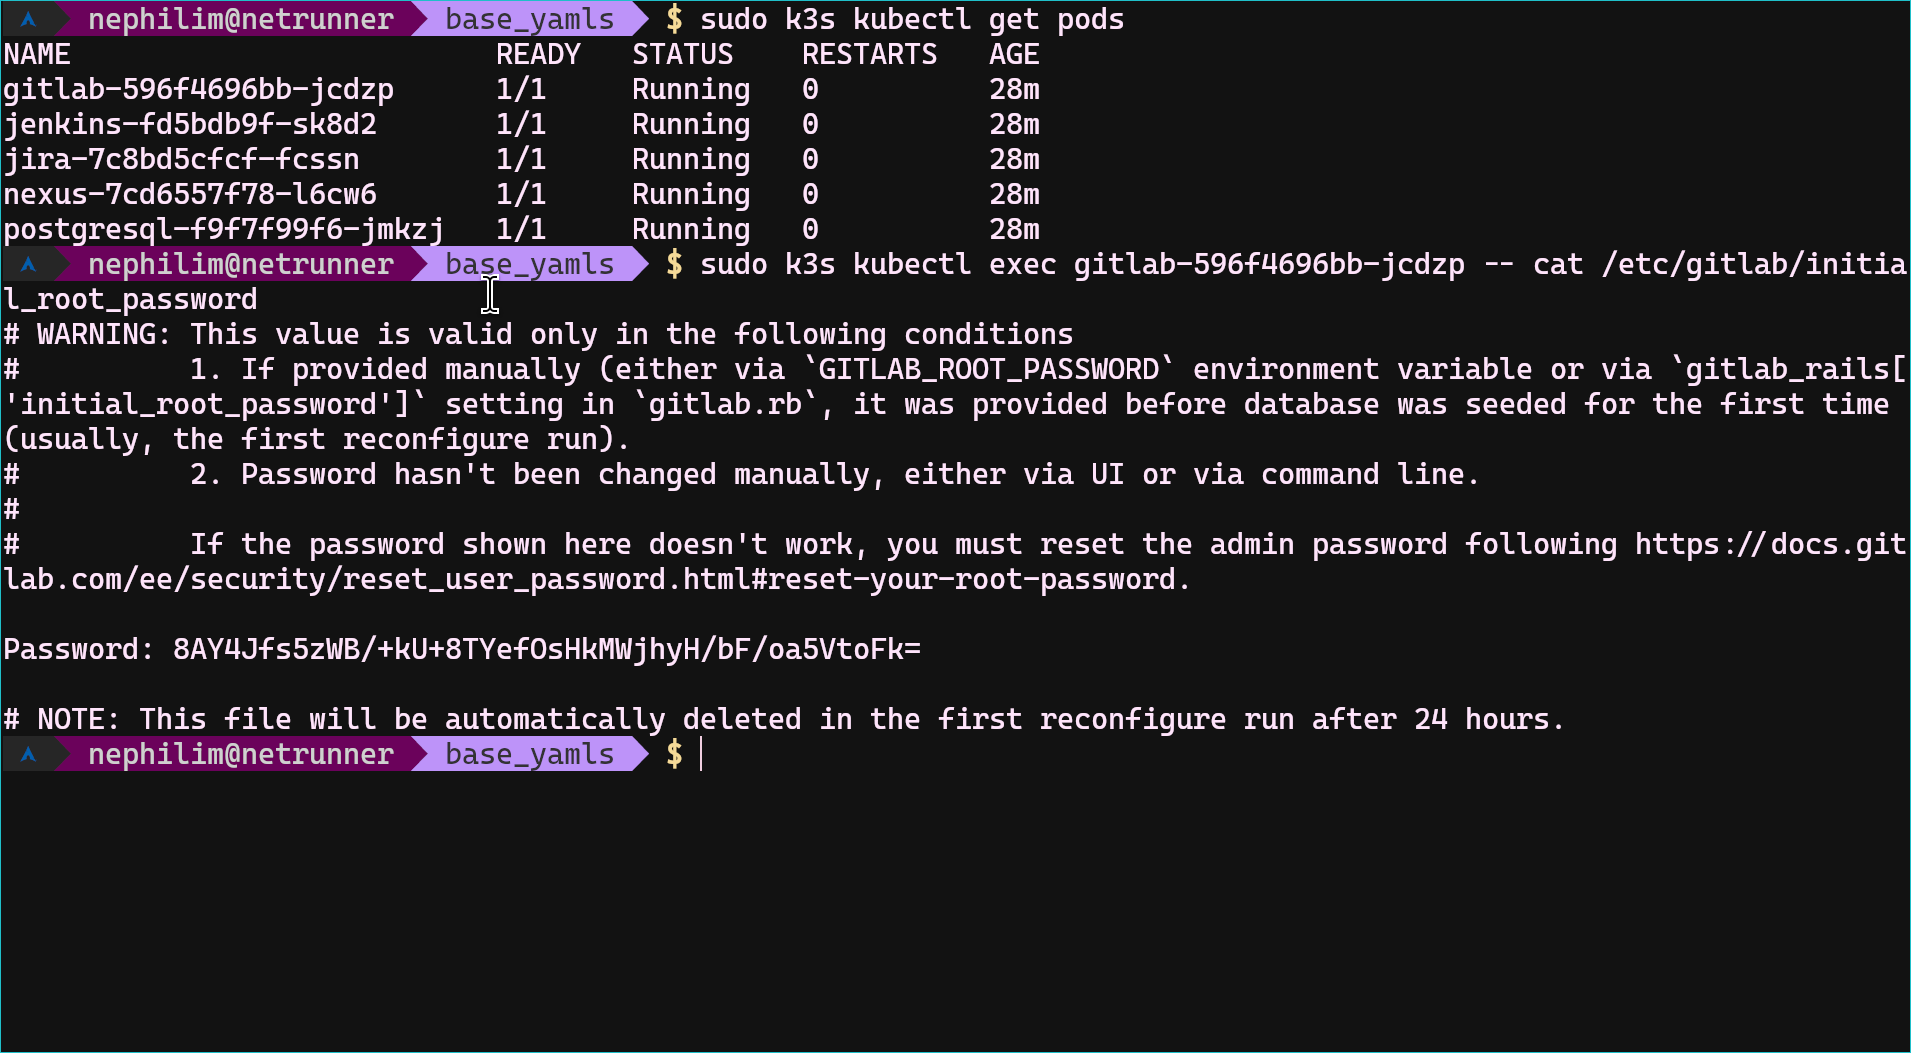
This password file will expire after some time, so do not forget to change the initial password. GitLab is ready to use actually. You can define and add your SSH key into your account from http://gitlab.local:8081/user_settings/ssh_keys and the last important thing is your host's ssh config. The default deployment yaml file exposes 2222 port as SSH. (not to conflict with the host machine's ssh port)
- # cat ~/.ssh/config
- Host gitlab.local
- HostName gitlab.local
- Port 2222
- User git
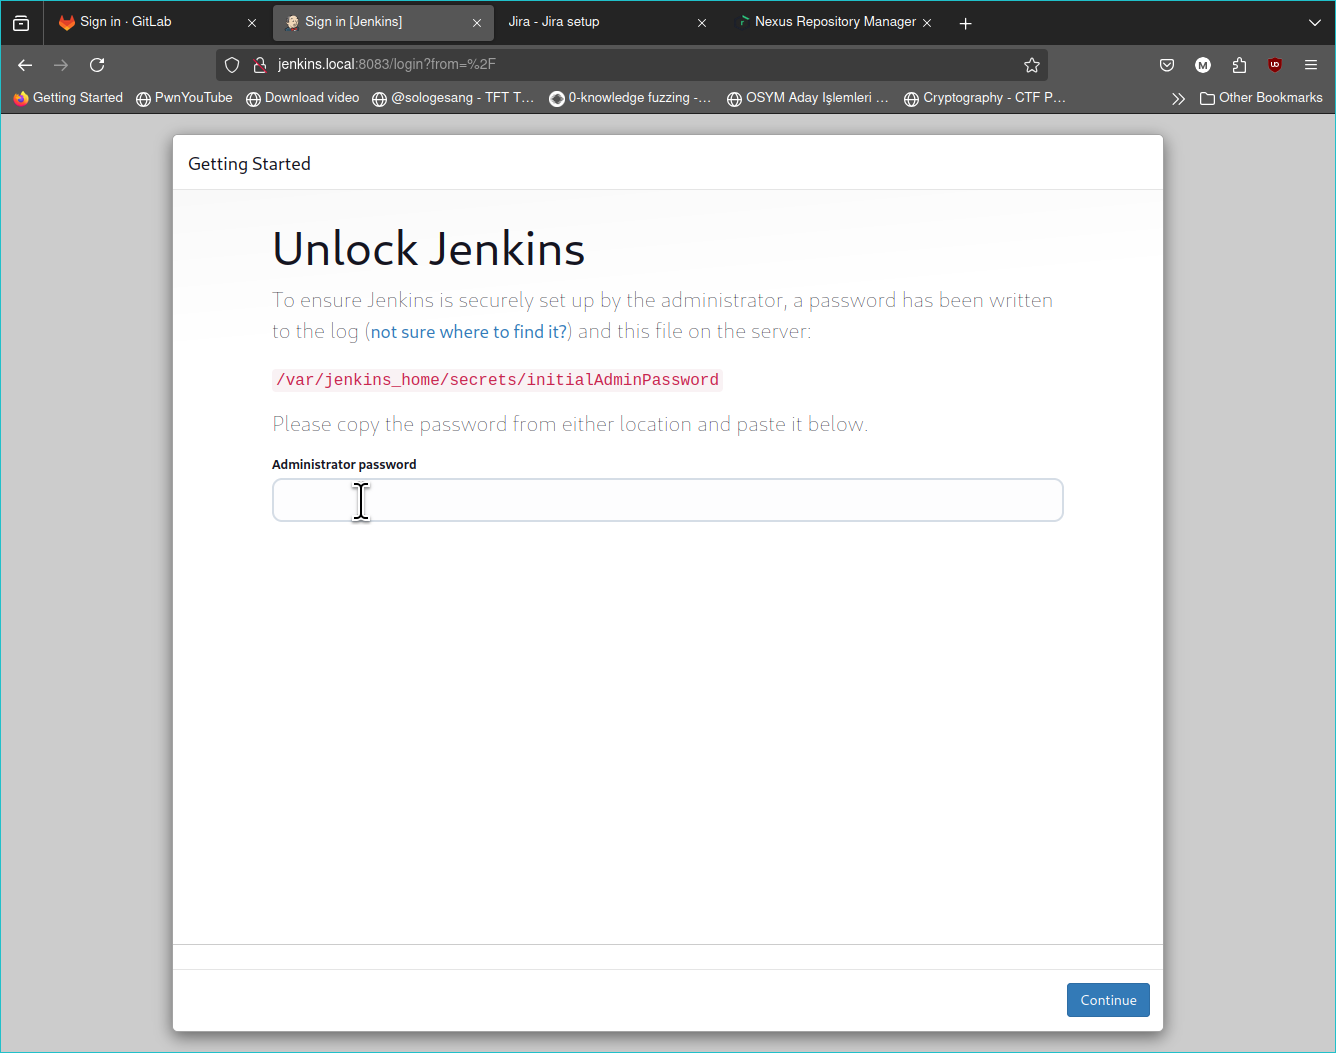
3 - Jenkins Setup
Run this command and get the initial password;
- # check your jenkins instance's unique name too, it must be something else.
- sudo k3s kubectl exec jenkins-fd5bdb9f-sk8d2 -- cat /var/jenkins_home/secrets/initialAdminPassword
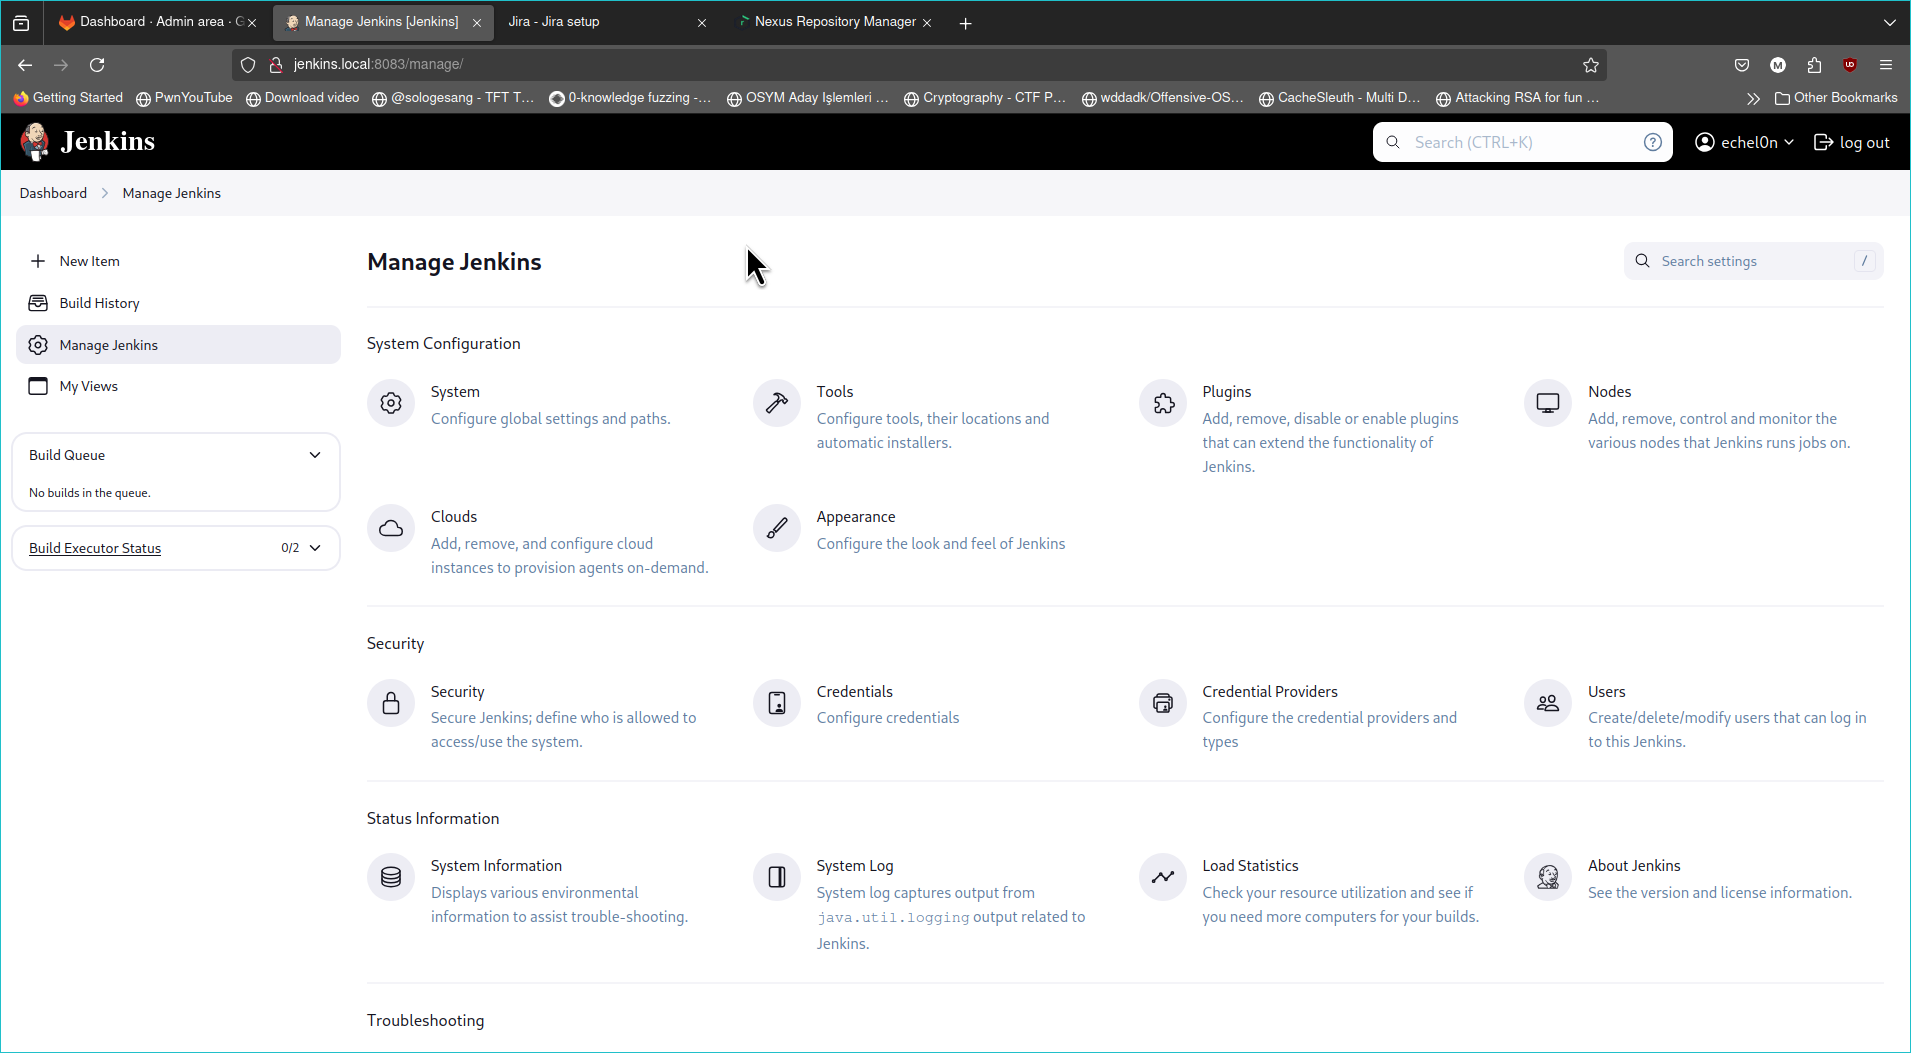
Set up the suggested plugins (to avoid missing anything), and also check the required plugins list after creating your admin user. Then, you should see the empty dashboard. We will be back while creating a new pipeline, we will use the jenkins instance for build and for other steps too. It is just local deployment so there is need to make it more complex tho. Just simply dismiss the warning notification. And also disable Security>Known Hosts check
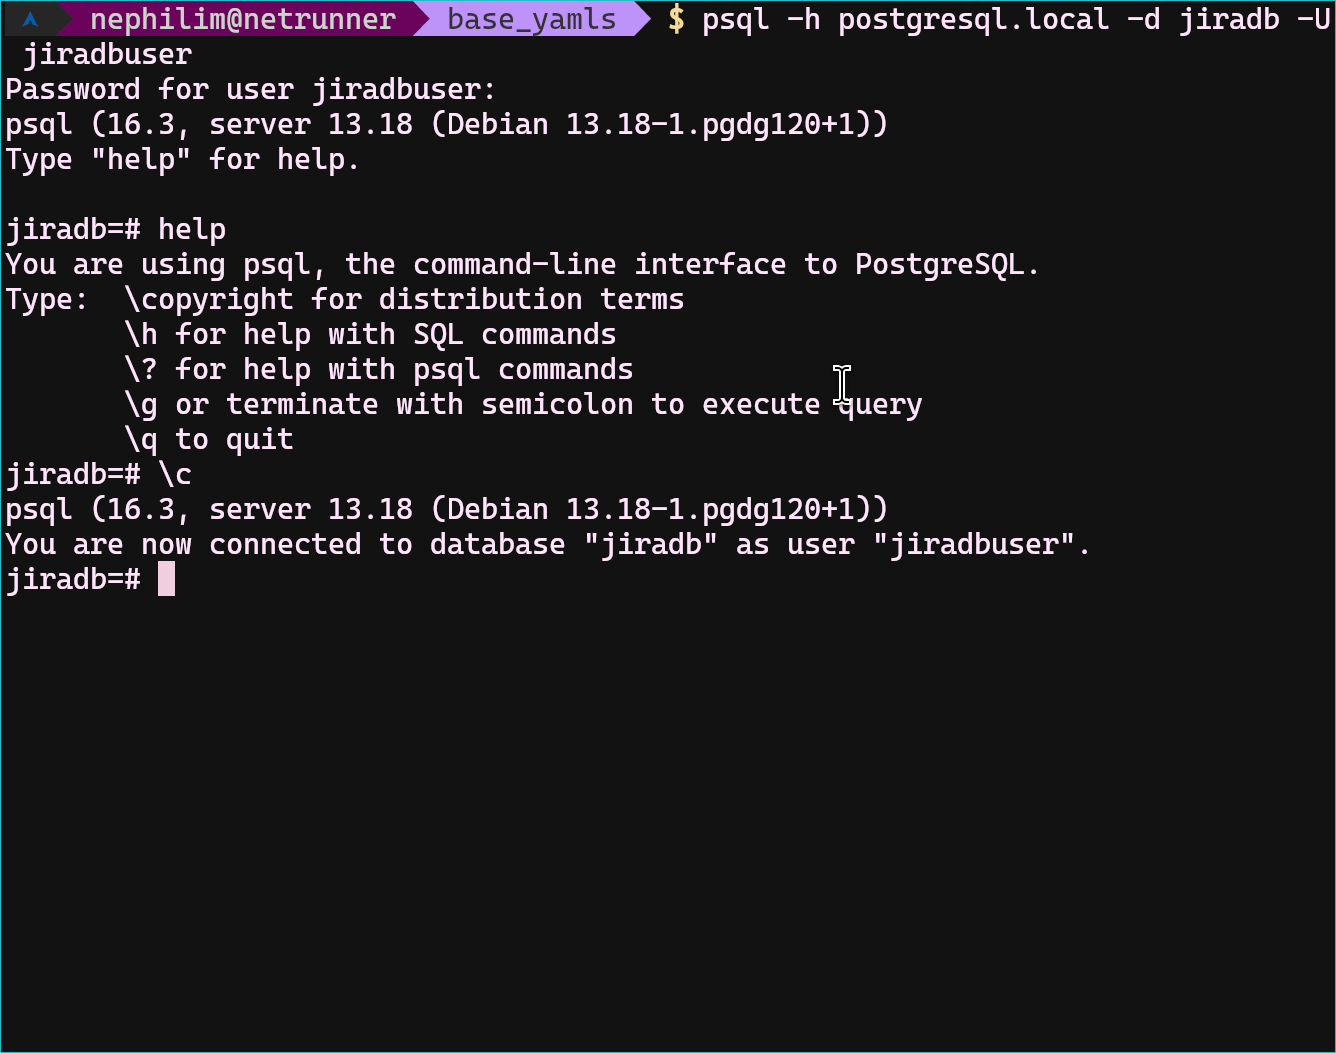
4 - Jira Setup
It starts with the database setup;
- Type: PostgreSQL
- Hostname: get postgresql.local's IP from /etc/hosts
- Port: 5432
- Database: jiradb
- Username: jiradbuser
- Password: jiradbpwd
- Schema: public
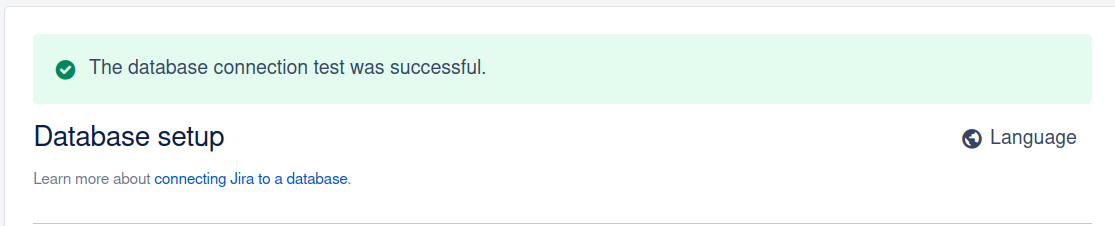
The test connection must show that the database connection test was successful.
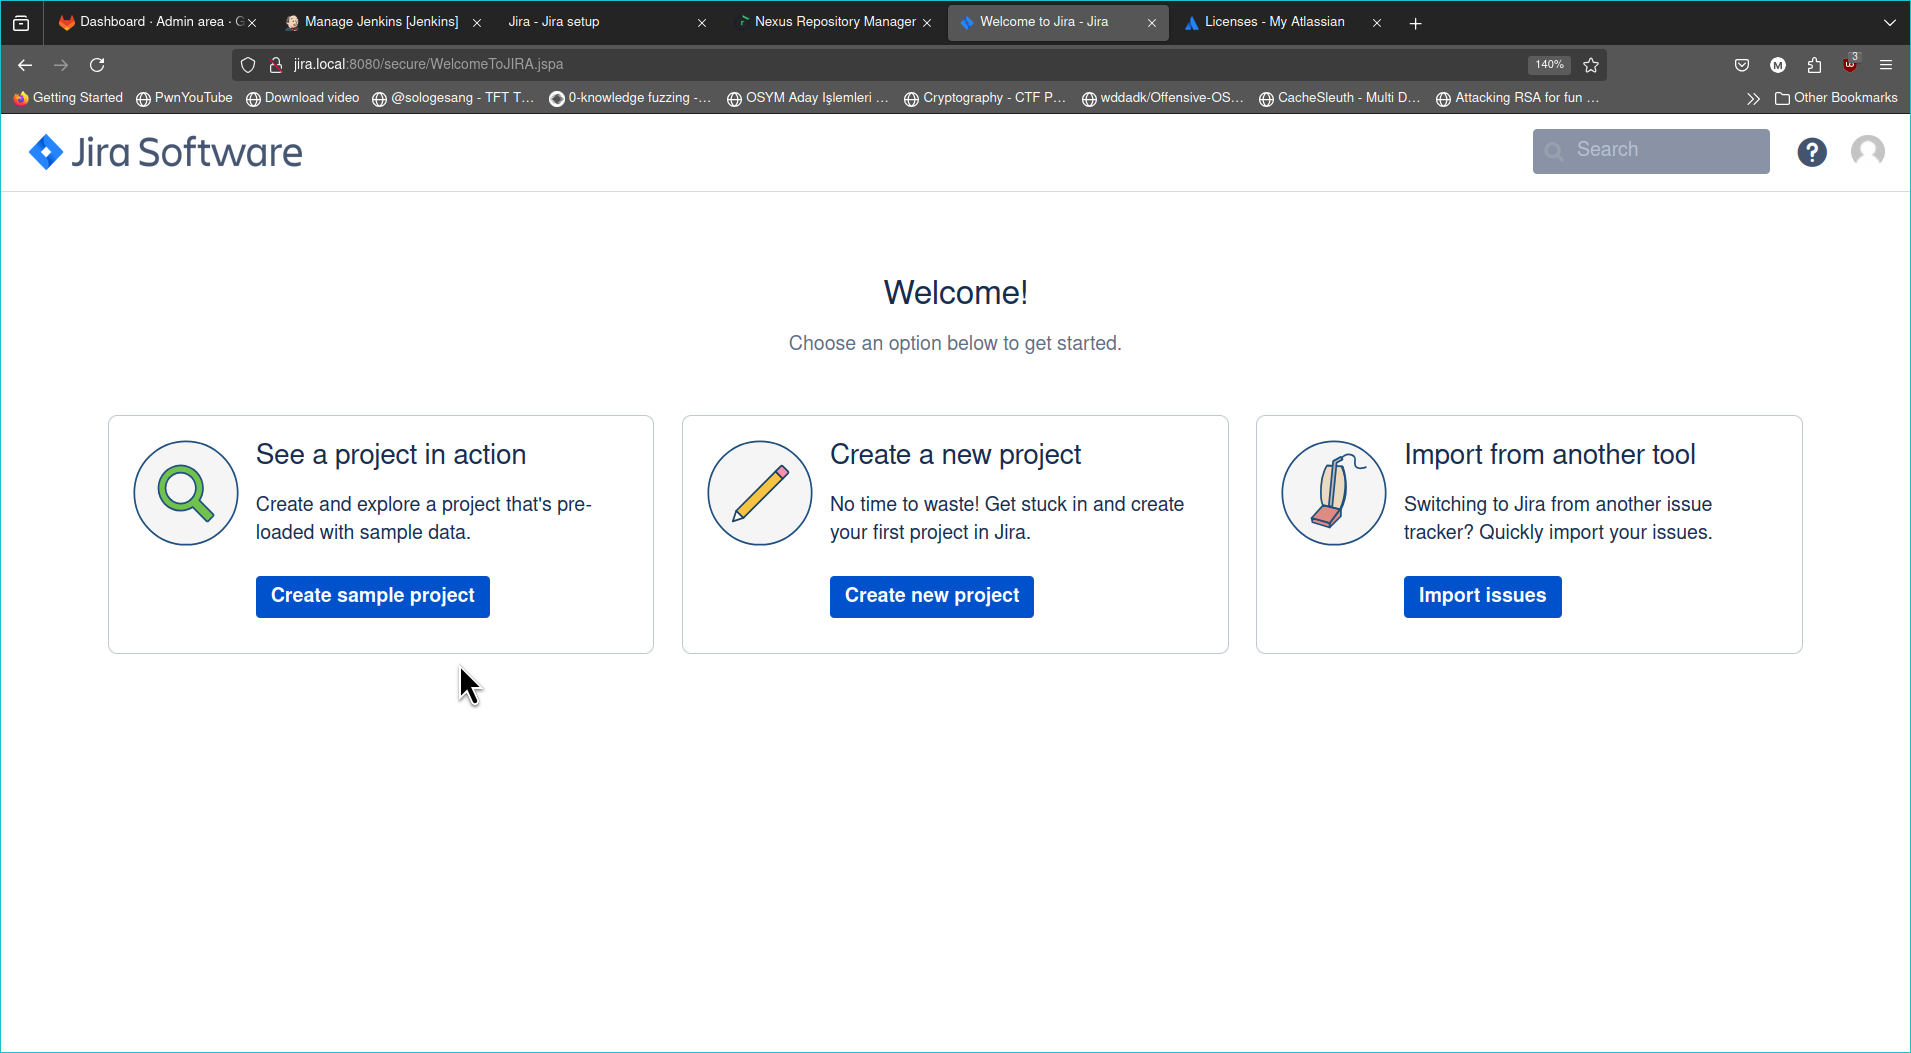
After awhile, you should see "Set up application properties" just make it public then go to the next At license page, You should visit and get your free license at MyAtlassian, just click and generate the license and copy license text from the table, and click next. Then, after some customization options you should see this;
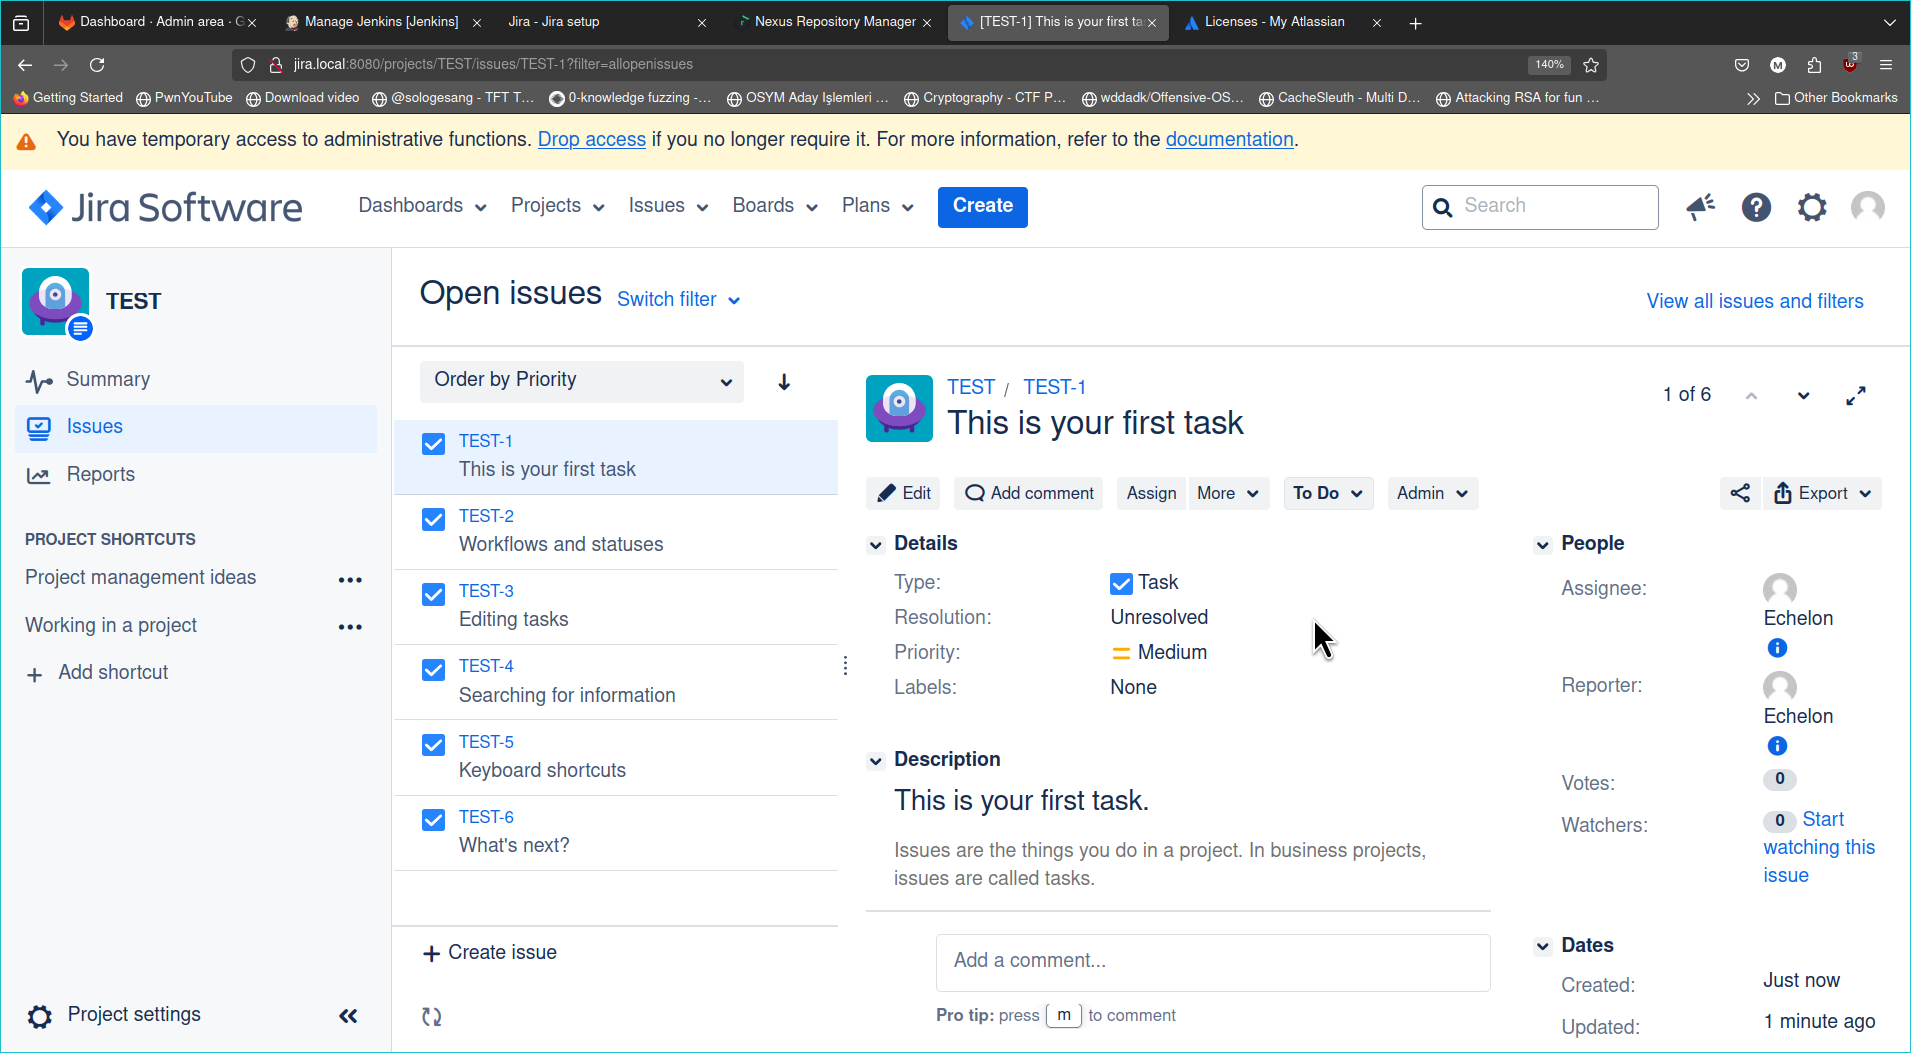
Then create an example project like this and leave it here for now, we will come back to Jira at future;
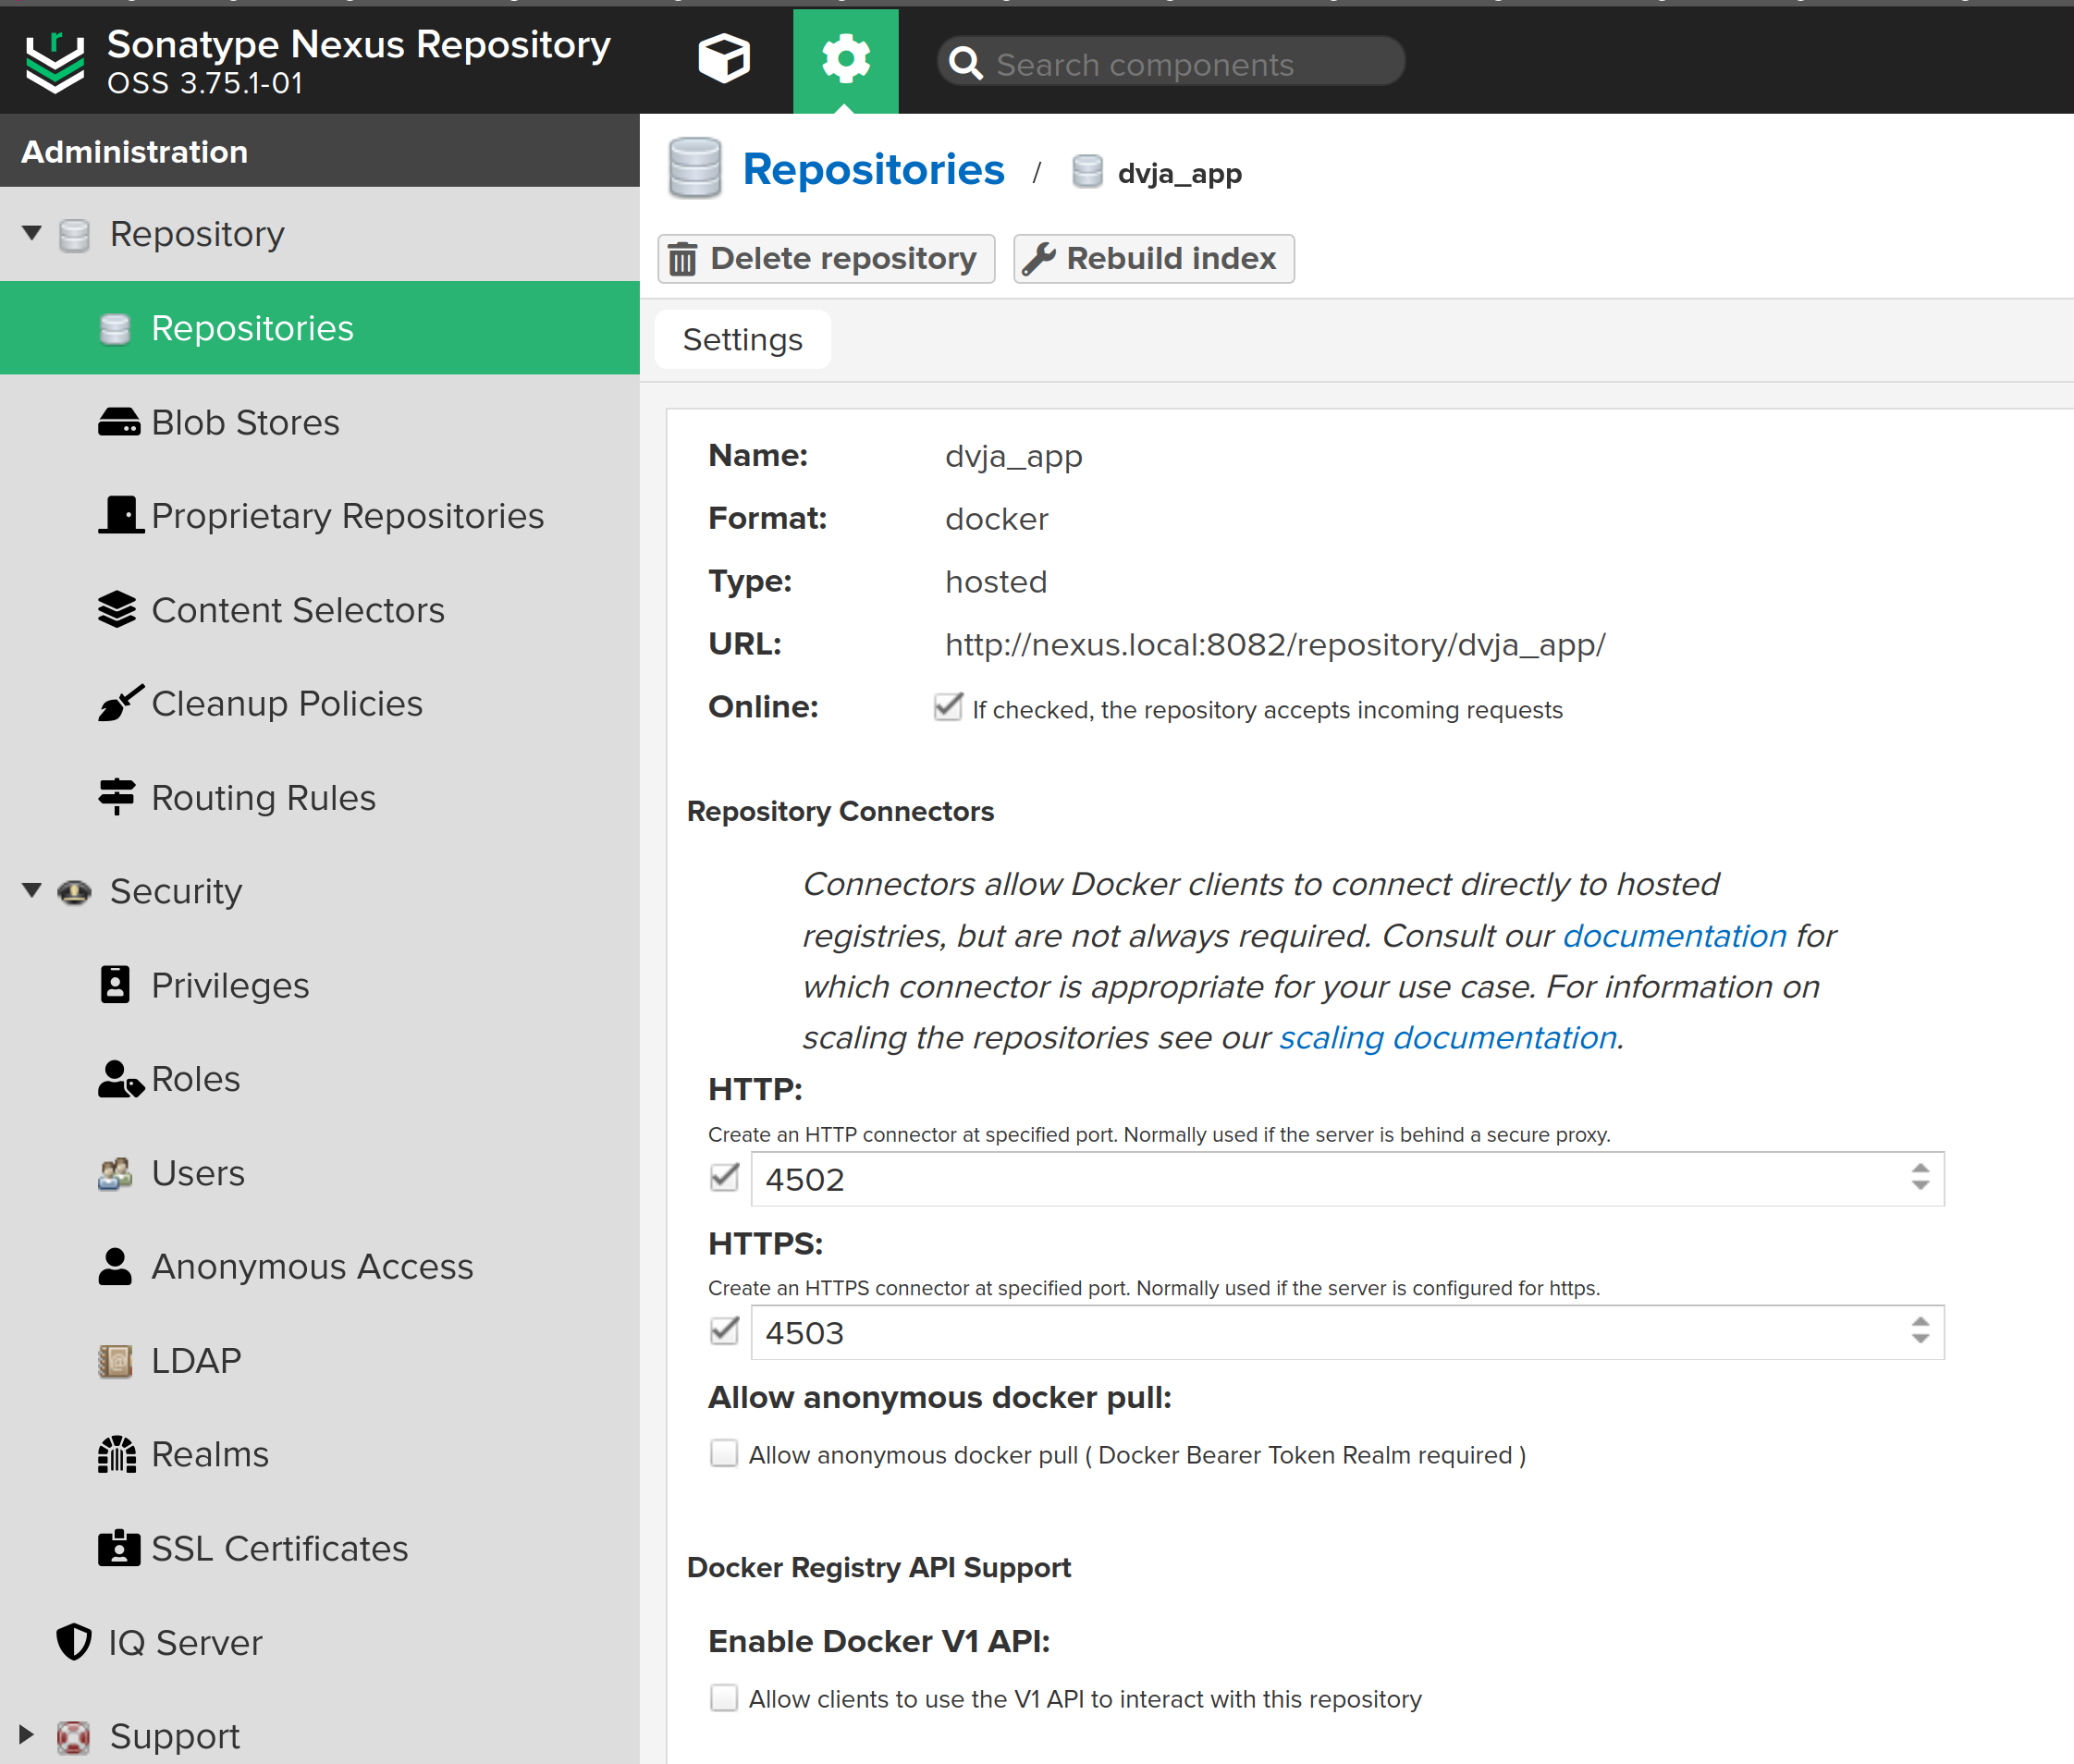
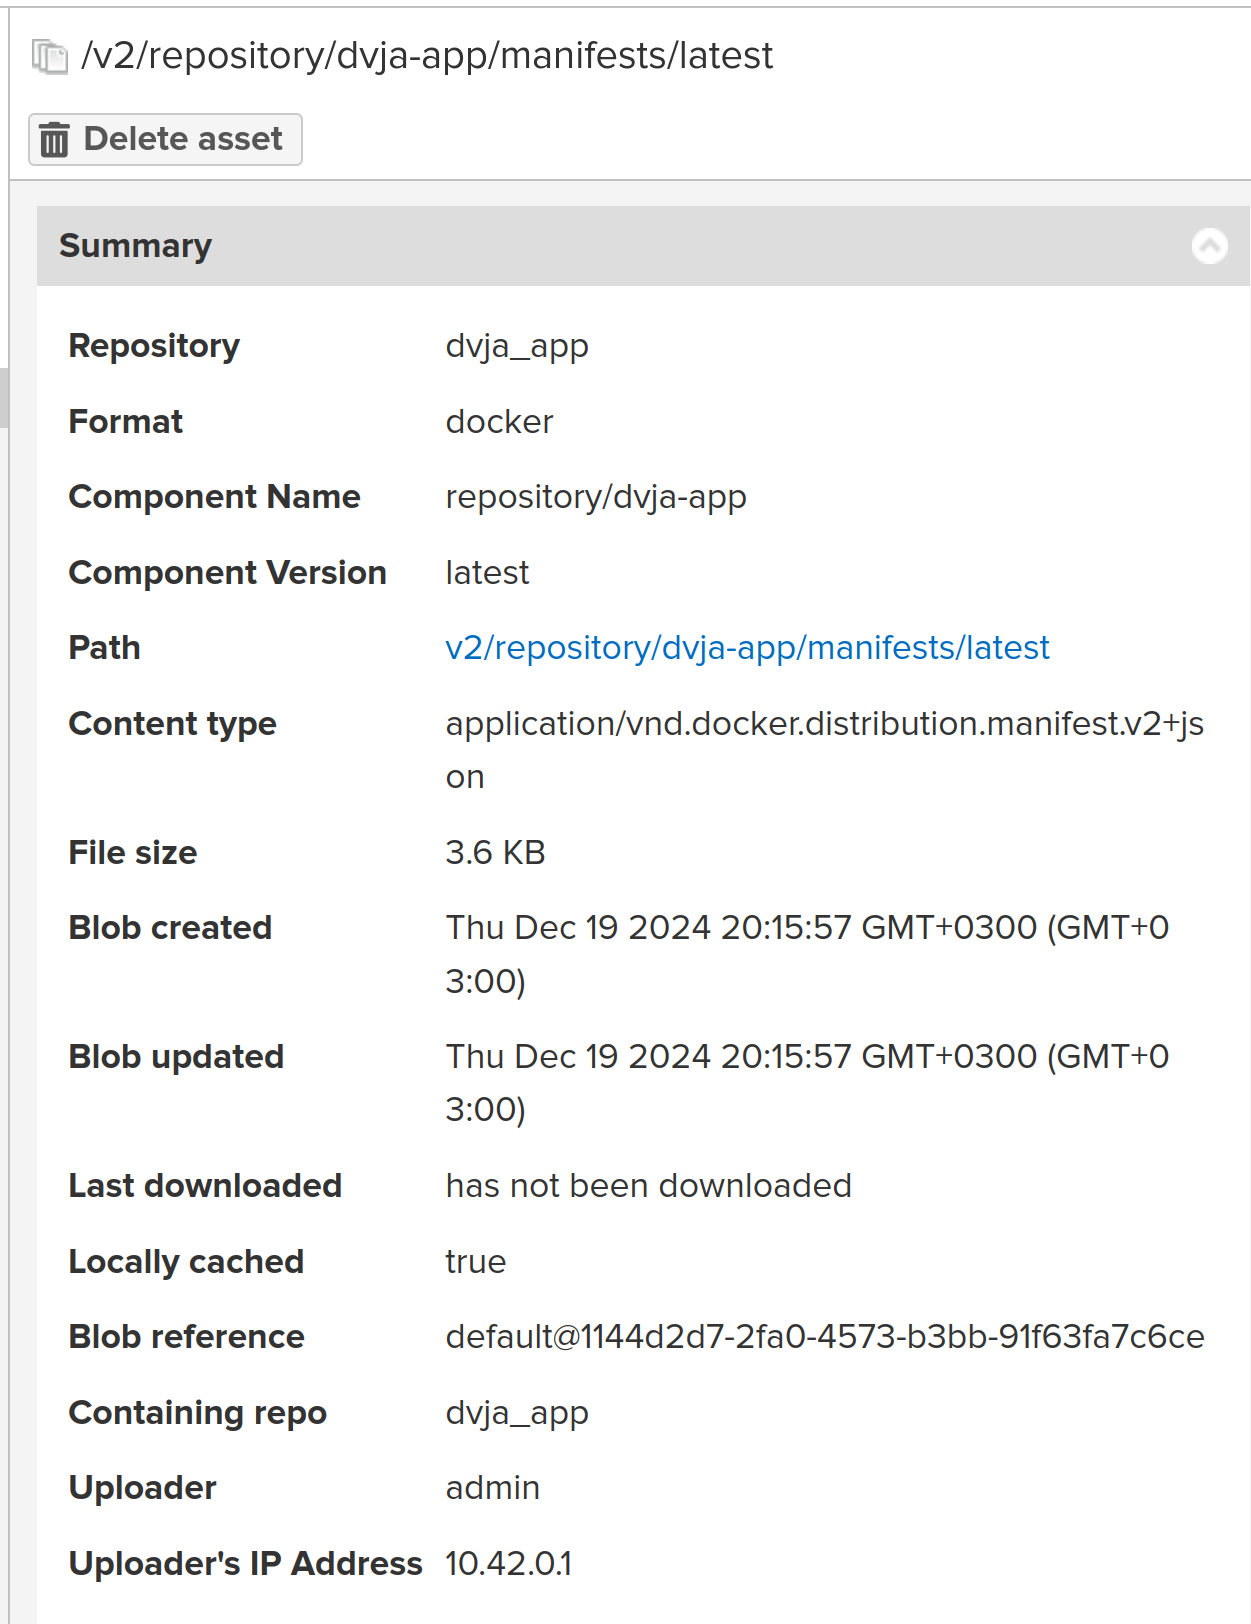
5 - Nexus Setup & DVJA Repository
Nexus' default credentials are located in /nexus-data/admin.password, you should get the password via connecting to terminal again. Also add this configuration (replace with your local Nexus instance IP) into /etc/docker/daemon.json and /etc/rancher/k3s/registries.yaml
Create a new repository from here:
- docker (hosted)
- Name: dvja_app
- Online: yes
- HTTP: 4502
- # Leave the rest as default
Also add this configuration (replace with your local Nexus instance IP) into /etc/docker/daemon.json and /etc/rancher/k3s/registries.yaml
- $ cat /etc/docker/daemon.json
- {
- "insecure-registries": ["nexus.local:4502", "10.43.108.151:4502"]
- }
- $ cat /etc/rancher/k3s/registries.yaml
- mirrors:
- "nexus.local:4502":
- endpoint:
- - "http://nexus.local:4502"
Get back to GitLab and create a new project. Also pull the original repository from here
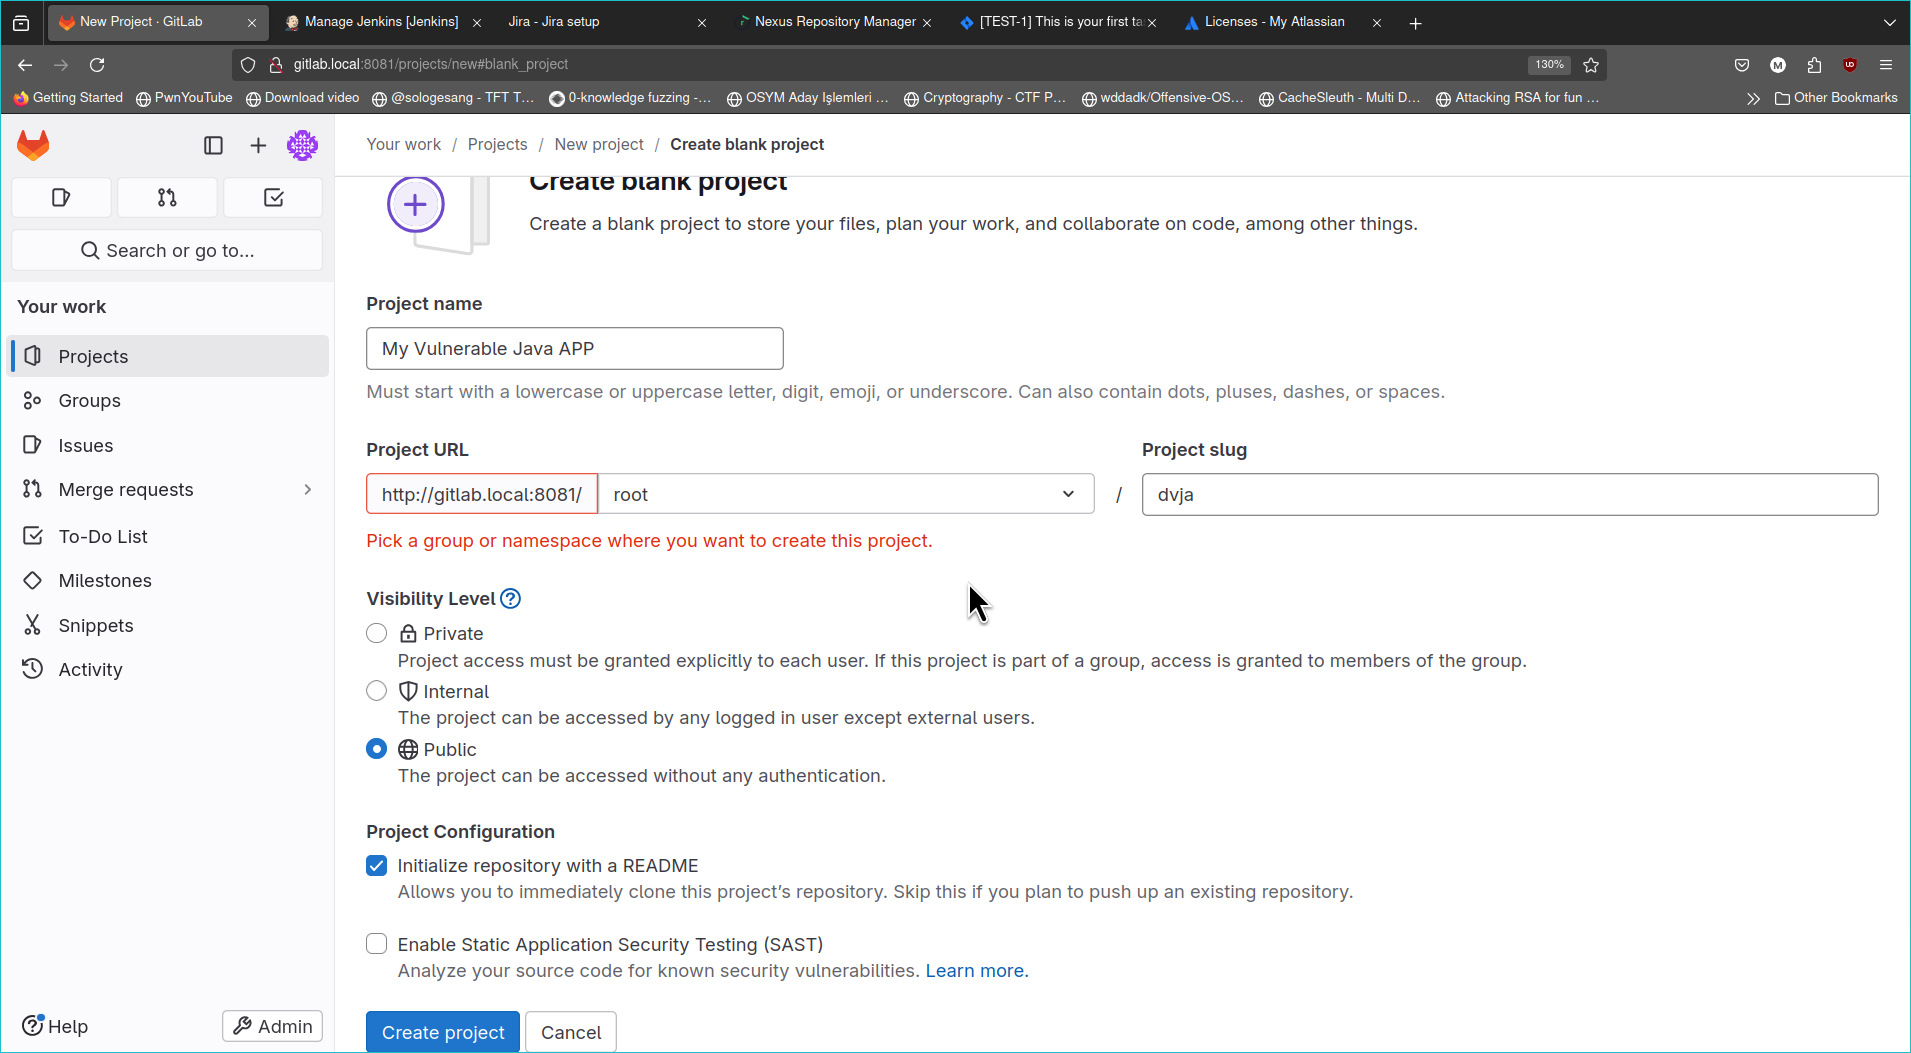
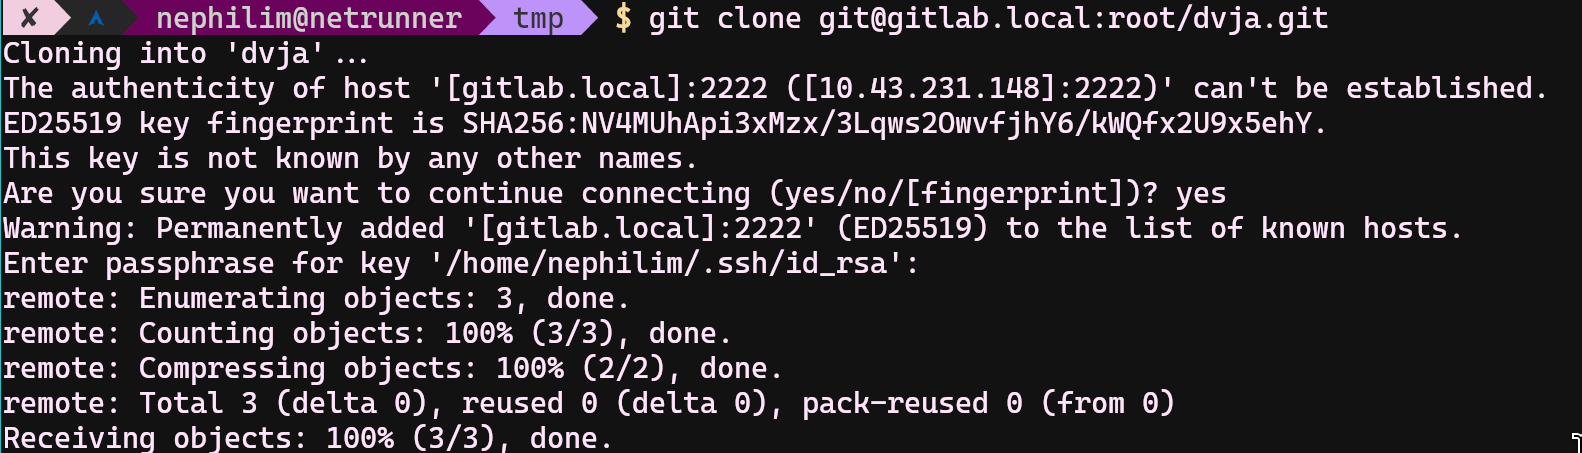
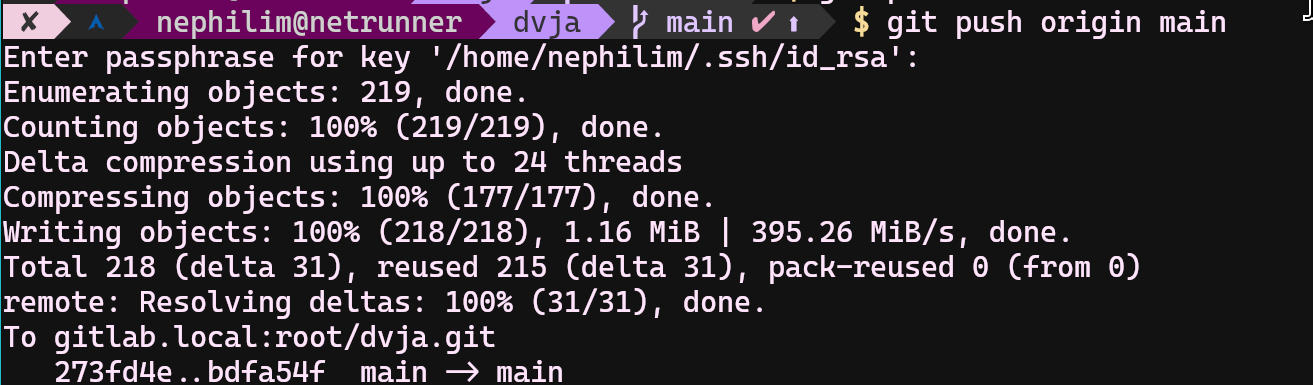
Copy all original dvja files to newly created dvja project (do not copy overwrite anything in .git folder) Copy also yamls/app/deployment.yaml file into this git repository we will be using it. Then you can push original dvja into your local gitlab repository;
- $ git add .
- $ git config --global user.email "admin@gitlab.local"
- $ git config --global user.name "admin"
- $ git commit -am "init"
- $ git push origin main
6 - Creating a Pipeline
Before trying to create a pipeline for dvja, you should check the required Jenkins plugins if they are installed. These are the required plugins;
- # here: http://jenkins.local:8083/manage/pluginManager/installed
- Docker API Plugin
- Docker Commons Plugin
- Docker Pipeline
- Docker plugin
- Config File Provider Plugin
- Maven Integration plugin
- Pipeline Maven Integration Plugin
- Pipeline Maven Plugin API
- SSH Agent
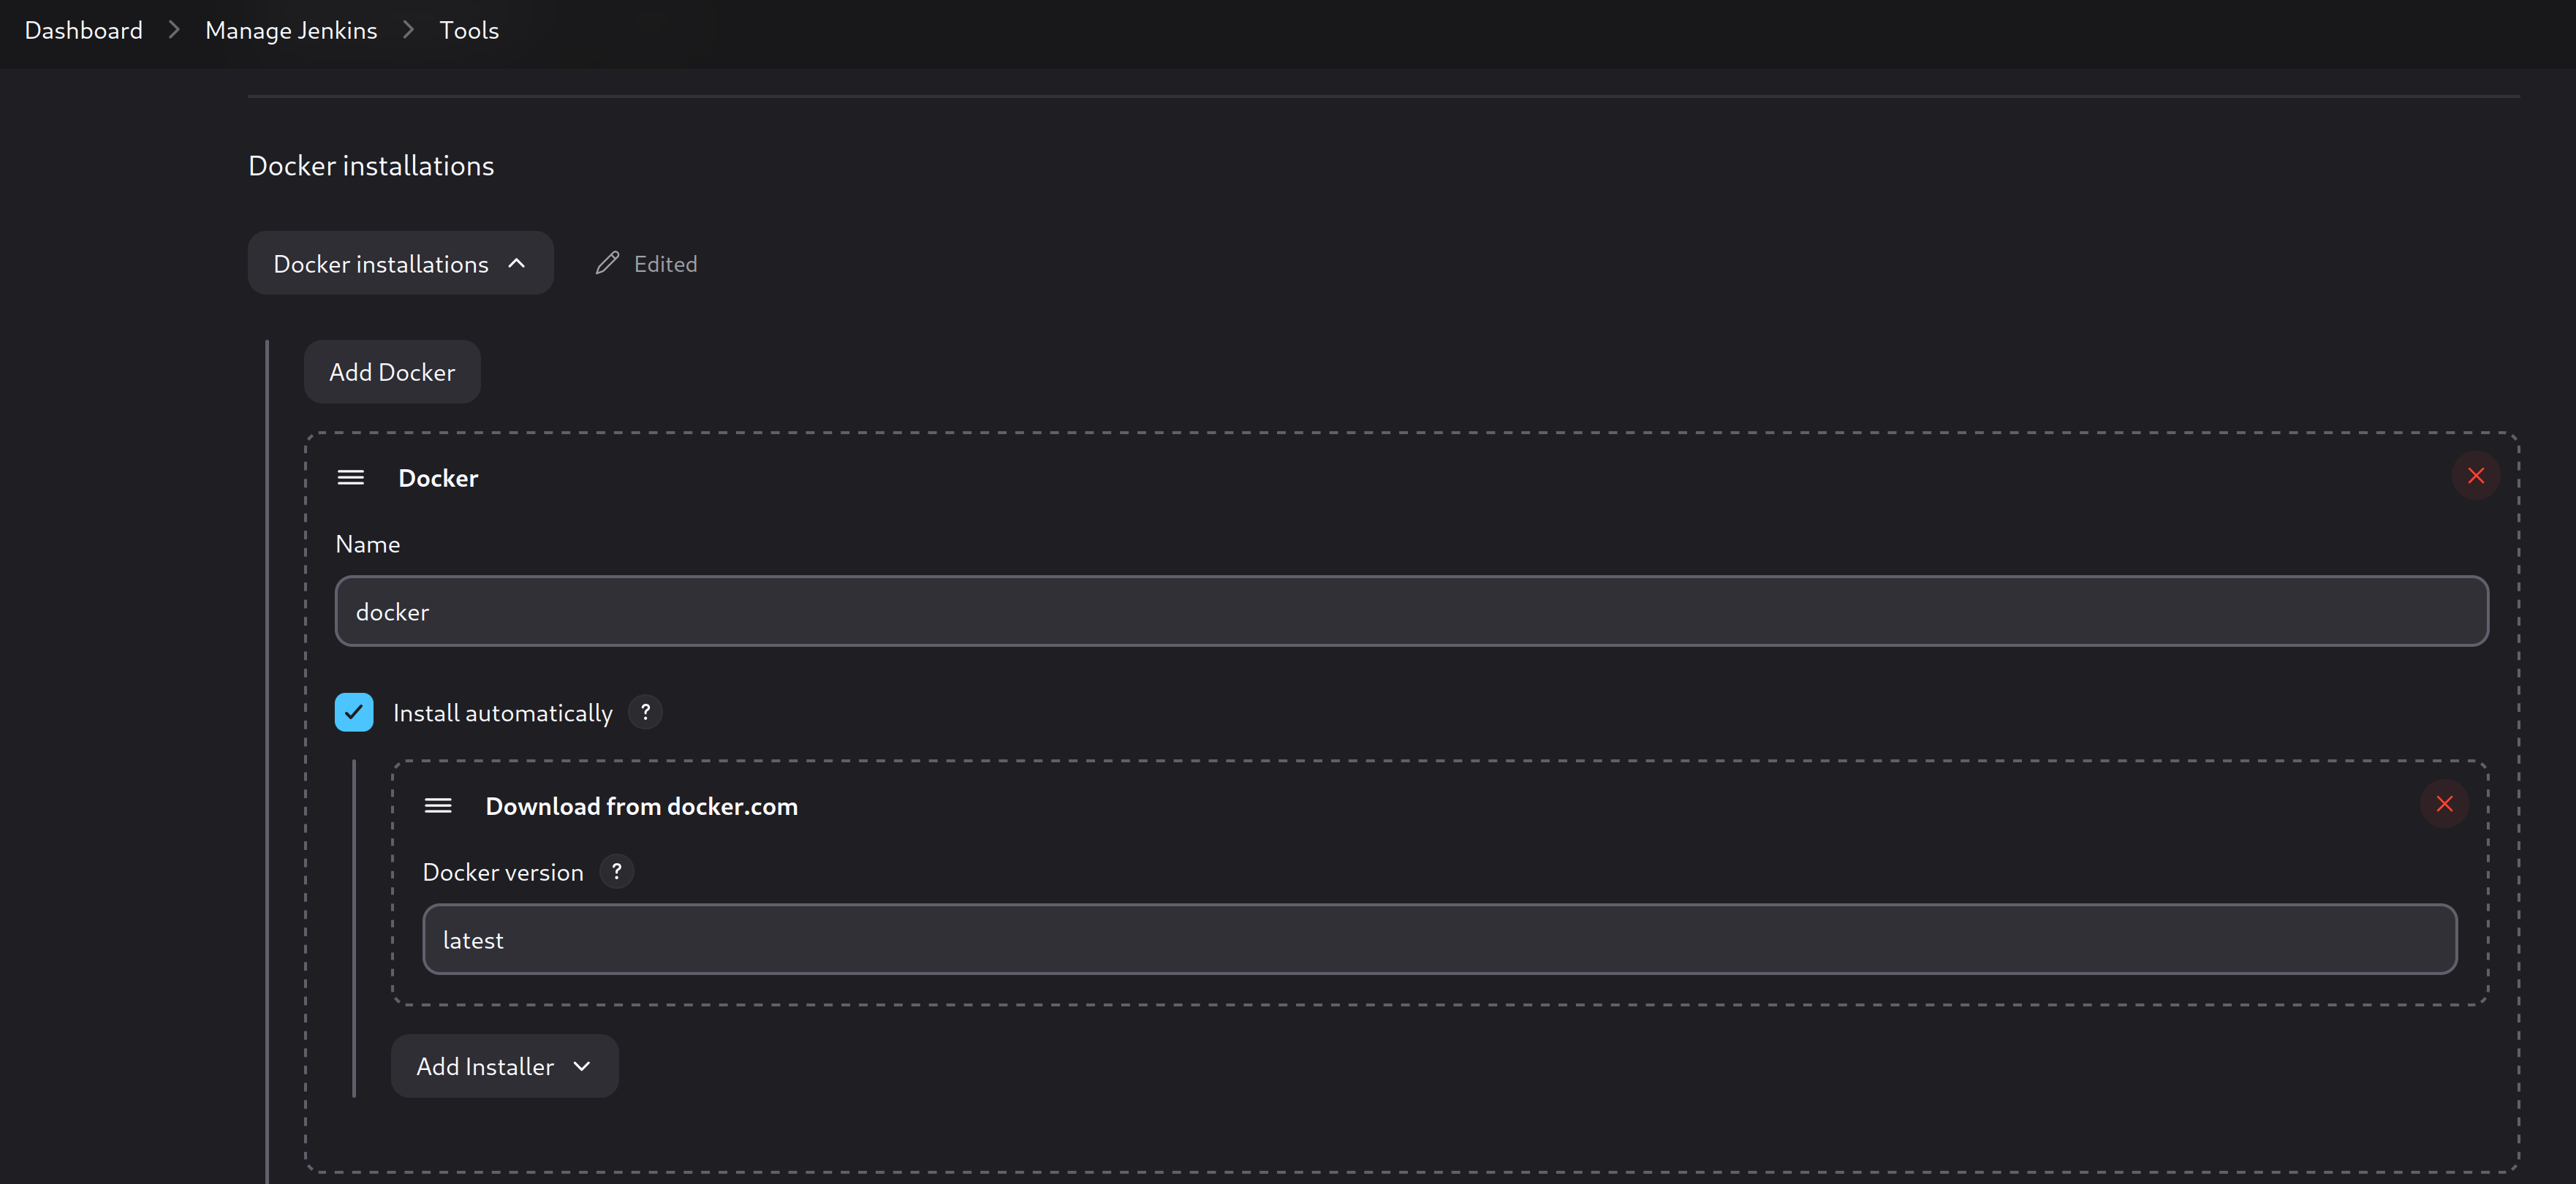
At this http://jenkins.local:8083/manage/configureTools/ URL, scroll down to Docker Section, and fill the blanks as in this screenshot below;
Then, also you need to define the secrets into Jenkins for GitLab, Nexus and SSH
- 1) SSH_LOGIN_HOST -> This private key will be used for k8s deployment
- 2) GIT_PASS -> This private key gitlab root user's private key
- 3) NEXUS_PASS -> It is better to add the NEXUS credentials here
If Maven Integration plugin does not work, you can also put mvn into some directory manually and then you can call whenever its needed. At this http://jenkins.local:8083/manage/configureTools/ URL, scroll down to Maven section, and choose;
- Install Automatically->Extract zip-> https://dlcdn.apache.org/maven/maven-4/4.0.0-beta-4/binaries/apache-maven-4.0.0-beta-4-bin.zip
- Subdirectory of extracted archive: apache-maven-4.0.0-beta-4
At this moment, you should be able to run the provided pipeline(jenkinsfiles/Jenkinsfile.basic) without the deployment part. You can comment it out and test if it works, otherwise debugging session will be waiting for you to solve the problems.
 6 - Deployment
Enable sshd service in host computer itself, we will trigger deployment steps from jenkins. (just run ssh-keygen -t rsa -b 4096 in your terminal and copy paste into area in "SSH Username with private key" view)
- # Do not forget to change sshd_config;
- $ cat /etc/ssh/sshd_config # trimmed output ..
- PermitRootLogin prohibit-password # if you are using root user solely, do not change this field otherwise you will not login into root
- AuthorizedKeysFile .ssh/authorized_keys # also add the new key in this file!
- PubkeyAuthentication yes
- $ sudo systemctl start sshd
- $ sudo k3s kubectl create secret docker-registry nexus-pass --docker-server=nexus.local:4502 --docker-username=admin --docker-password='wowsuchchar8!' # it's the Nexus Password
- $ sudo cat /etc/rancher/k3s/registries.yaml # it should be looking like this
- mirrors:
- "nexus.local:4502":
- endpoint:
- - "http://nexus.local:4502"
Then uncomment the deployment stage and run again! Do not forget to check and change the fields in Jenkinsfile.basic file with your credentials, IPs and other informations.
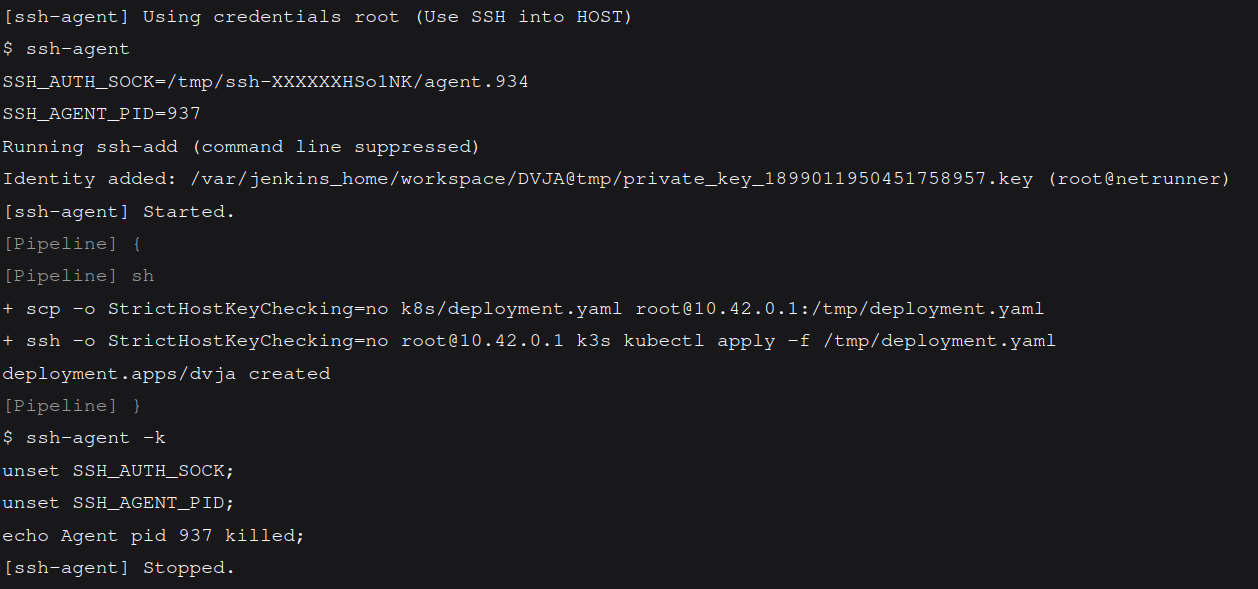
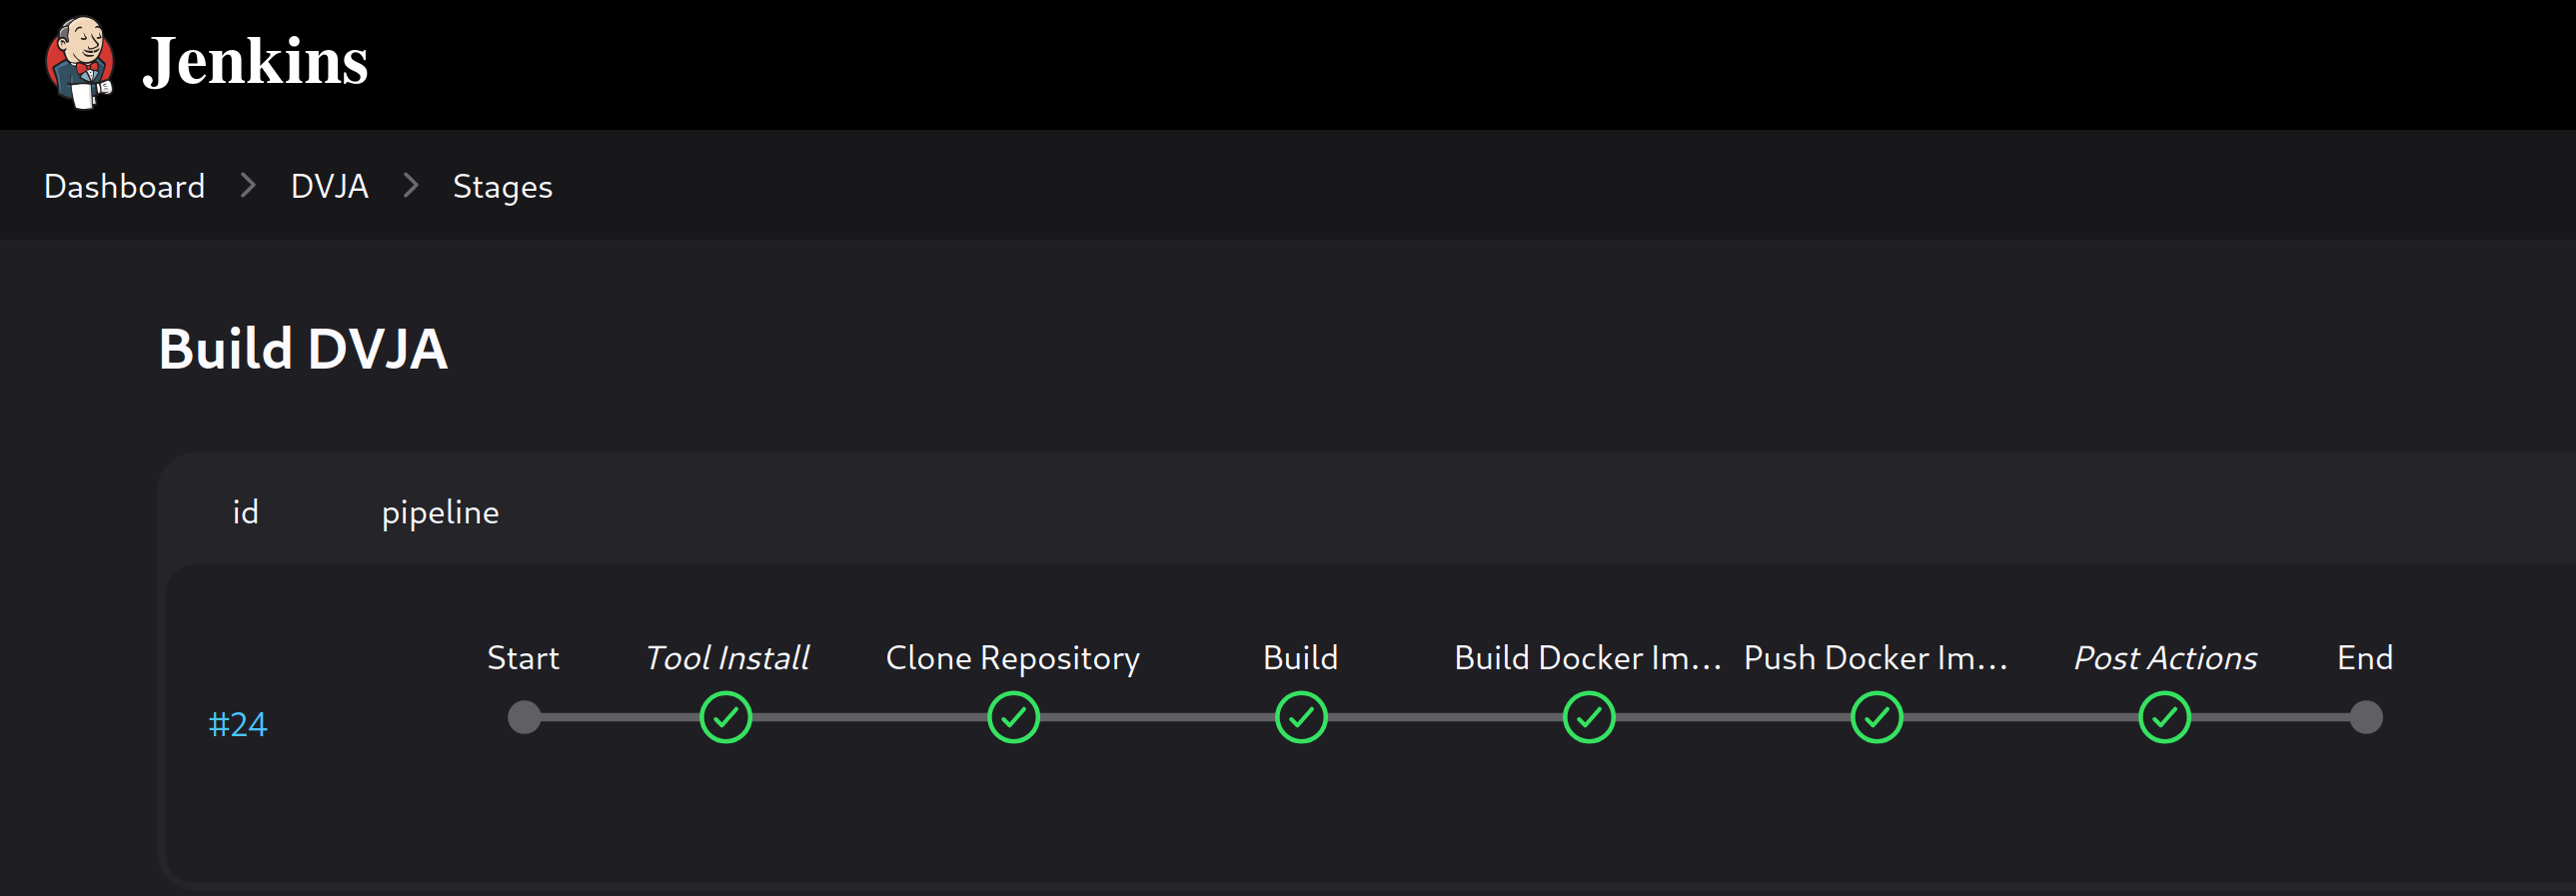
So the output seems like it is deployed into k8s! Let's check!
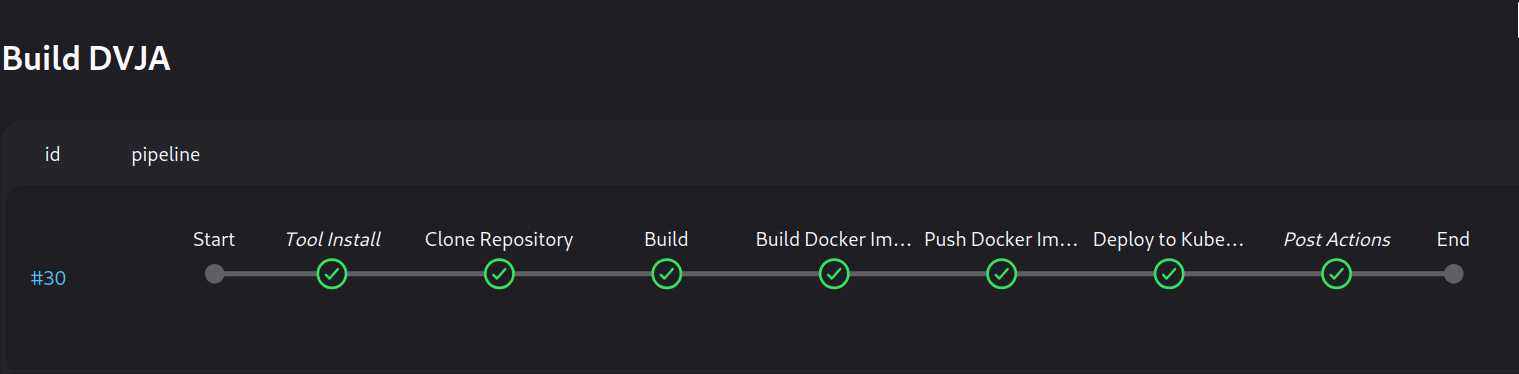
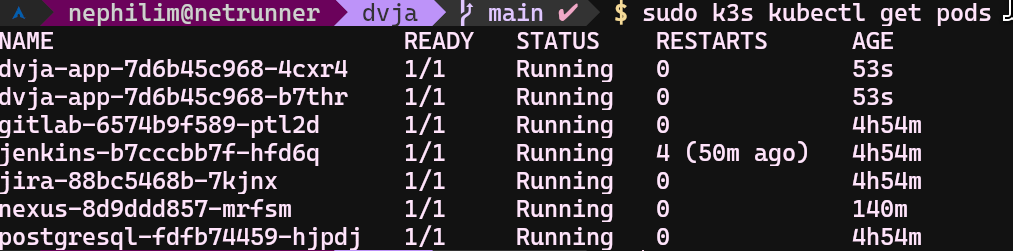
- debug tip: sudo k3s kubectl describe pod dvja-app-7b84d4596b-9jh9w
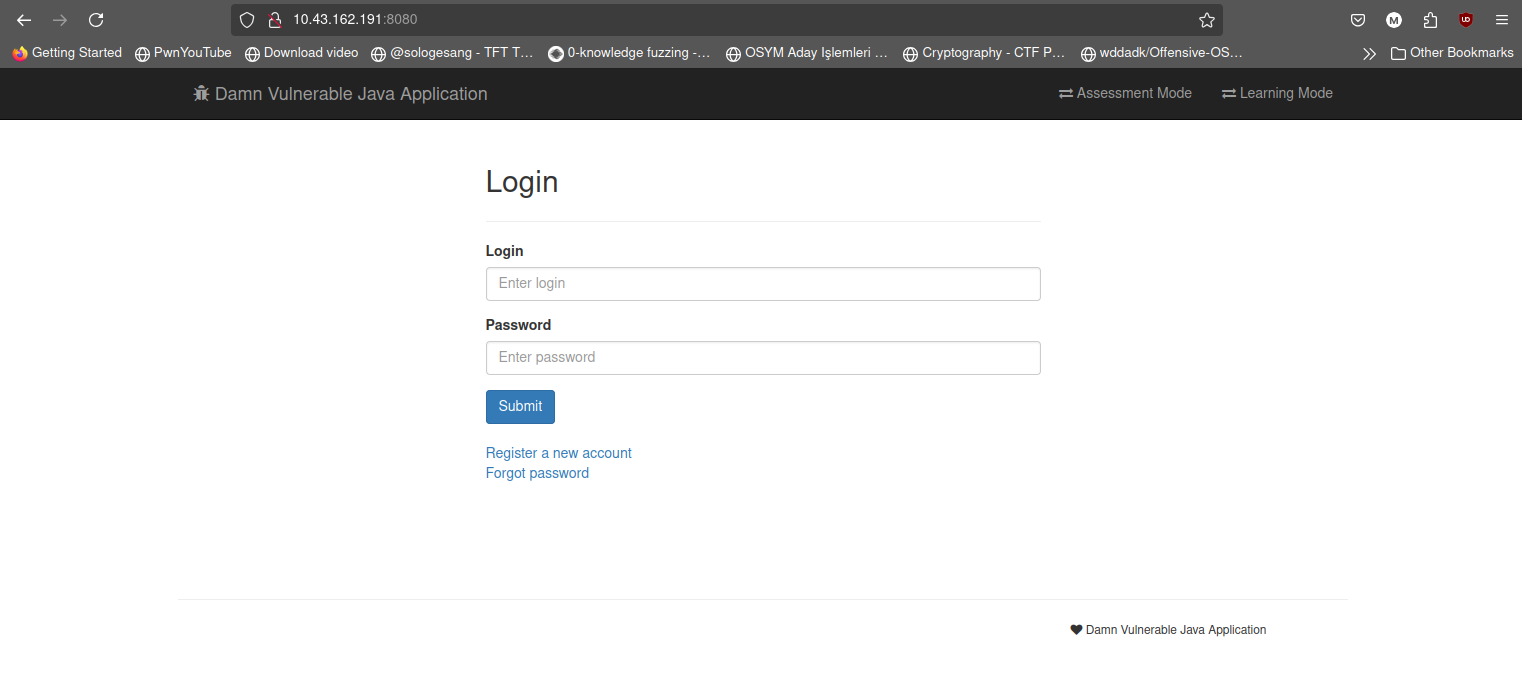
Yeah it is running! Let's check our application directly.
7 - Conclusion
So yeah, we now have a fully functional CI/CD pipeline for this damn filthy vulnerable Java application. The CI/CD itself is not much production ready but hear me out! The reason why it is not much safe and does not follow the basic rules of DevOps is, it is your local machine. If you are willing to try it yourself, you will see that this configuration is heavy! I had multiple unresponsive minutes while I am writing this write-up. Plus, I do not want to deal with a state-of-the-art DevOps setup, this is just a minimal environment to explore and learn the DevSecOps experience. It can be just merely seen that is enough to discover and learn the DevSecOps experience.
Now, we have bare minimum development environment to start with the security operations! In the next blog, we will be implementing SAST integration as a step in this Jenkins pipeline and see the results and how we can improve things or detect some bugs in this vulnerable java applications.
Most probable problems are listed in the repository, check out when something is broken or not running as I explained.
That is all for now! Thanks for finding my blog interesting enough to read. Have a nice day, you absolute legends! 🎉
References and Links
- First Part - https://devilinside.me/blogs/devsecops-series-introduction
- Provided Configurations and Scripts - https://github.com/echel0nn/devsecops-series
- What is Kubernetes? - https://kubernetes.io/docs/concepts/overview/
- What is Docker? - https://docs.docker.com/get-started/docker-overview/
- What is Jenkins? - https://codefresh.io/learn/jenkins/
- K3s Vs K8s: What’s The Difference? (And When To Use Each) - https://www.cloudzero.com/blog/k3s-vs-k8s/
- k3s Mainpage - https://k3s.io/